General Info,Projects,Projects,Projects,Projects,Projects

Quick Christmas DIY Framing

ProjectsElizabeth Ramos

I picked up this screen printed poster from Dapper Ink earlier this week for a steal ($12 for an 11 x 17" print!), but I needed some real inspiration for how to mount and hang it in my living room. I didn't want to do a traditional frame from the hobby store--I have such a hard time finding one that I like, and anything custom costs an arm and a leg. Not to mention, since this is a seasonal print and will be packed away in less than a month, I wanted to showcase it in an unconventional way. So I went on a hunt through the house, and came up with a framing technique all my own. Although I think this mounted poster turned out really great, this method could work for any holiday paraphernalia you pick up this season (photos, greeting cards, etc.)

Screen shot 2012-12-12 at 2.36.41 PM
Screen shot 2012-12-12 at 3.43.01 PM

What you need:

Poster or holiday print 1/4" thick plywood (or foam core board if you're in a pinch) Washi tape Blade or scisors Double sided foam tape Small eye screw (optional) Nail or frame mounting hardware (optional)

How to do it:

1) Start by measuring your poster, photo, or print. You'll be mounting this onto the plywood. Then measure and cut your plywood. Obviously you want your plywood to be larger than the poster, but if you're wondering how much larger, a good rule of thumb is as follows: Make the plywood 3" larger than the print on the top, right, and left  and 3 1/2" larger on the bottom. Now, I'm lucky enough to have a husband with a table saw, so this wasn't an issue. However, if you don't have a friend or family member with a table or skill saw, this is where the foam core comes in handy. Simply cut it to size with a straight edge and blade.

2) Find a festive print or color of washi tape. Have I ever mentioned how much I love washi tape?? I truly use it for everything...packaging, labeling, and now apparently framing too.

Screen shot 2012-12-12 at 2.33.56 PM

3) Line up the washi tape with the horizontal and vertical edges of the plywood. Carefully roll it to the opposite end (it's fragile) and firmly press to smooth. I liked this method because it kept me from sanding and filling any of the rough edges of the plywood. Trim your edges once you've gone all the way around the plywood and are satisfied with the placement.

Screen shot 2012-12-12 at 2.33.39 PM

4) Adhere the double sided foam tape to the four corners of the back of the print and line up on top the plywood. Press firmly. I like the floating look of the foam tape.

5) To mount on the wall, I screwed in a single eye screw into the center of the back of plywood about 2" from the top. Then I hung it from an existing nail on the wall. But this piece has a large enough presence, I could just lean it against the wall on a table or mantle.

So that's that! Super simple and a really festive way to hang a holiday print.

Tote Bag Giveaway

General InfoElizabeth Ramos

Thank you so much to everyone who came out this weekend to support the Holiday Fair! We had a great crowd with over 1,300 people attending. And it was also great to make new friends in the arts district. There's some amazing talent over there. If you'd like to see more pictures of the Fair, check out our Facebook album.

Well, it's Christmastime, and we're feeling really festive today. Not to mention...We just hit 2,000 fans on Facebook, so as a thank you to all our fans, we're doing a little giveaway.

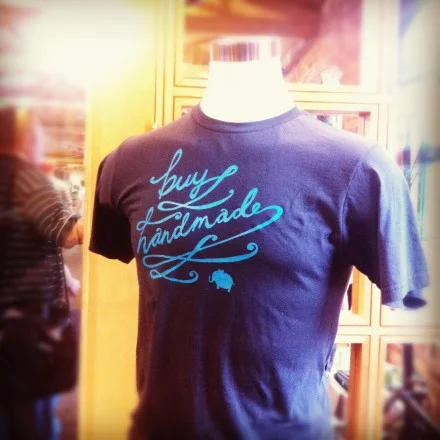
What's up for grabs: 2 of our Buy Handmade tote bags. These totes were screenprinted right here in town by Dapper Ink on fabulous Baggu bags. These totes are super sturdy and durable, and fold up into a tidy little pouch for carrying wherever you go.

How to enter: Comment on this post! Tell us what you're buying or making handmade for the holidays.

Deadline: The 2 winners will be drawn randomly and announced on Friday, Dec. 7. We'll ship the prize anywhere in the continental US.

Holiday Fair Gift Guides Part 2

Artist Showcase, General InfoElizabeth Ramos

We're back with more handmade suggestions for all of those people on your Christmas list.

FOR THE COLLECTOR:

For those who are always looking to add to their gallery wall.

il_570xN.292093030

Benediction print by Chris Koelle

il_fullxfull.377265425_m7h3

Operatic Dragon print by Cory Godbey

FestivalinthePark5

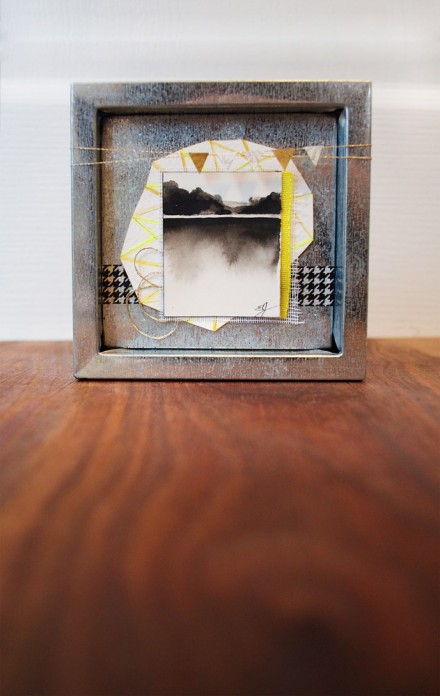
Collage art by Emily Jeffords

il_fullxfull.374773290_2u03

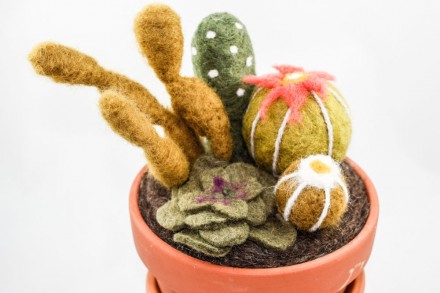
Felt cactus garden from Once Again Sam

GREAT STOCKING STUFFERS:

Need just a little something for a party, gift exchange, or stocking? These artists will have items under $10.00 at their booths.

6148807175_b64d324a85_b

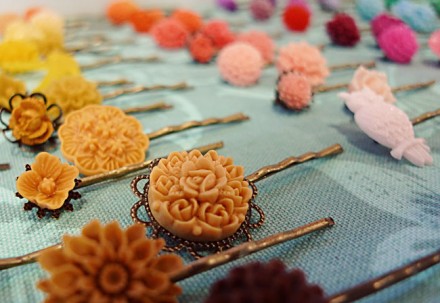
Assorted Bobbies from 17 Dove Street

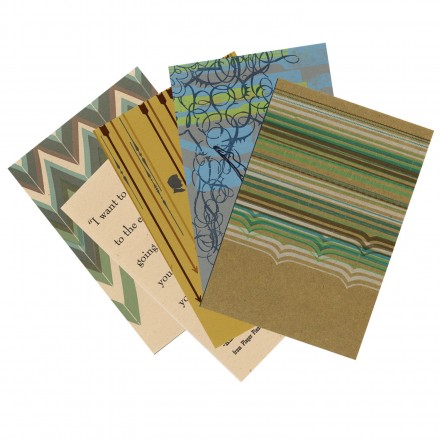
Letterpress greeting cards from Quill and Arrow Press

Screen shot 2012-11-29 at 12.14.05 PM

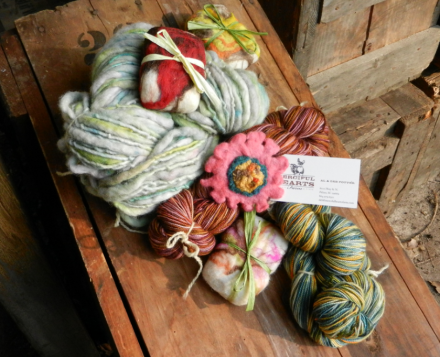
Hand spun yarn skeins from Merciful Hearts

6148806385_9b7073089e_b

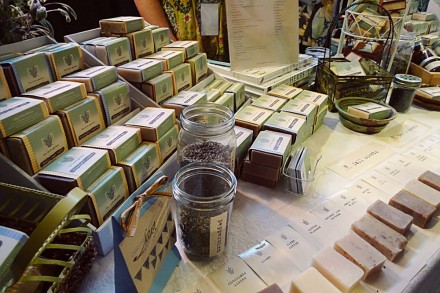
Locally made soaps and scrubs from The Herb Garden

Screen shot 2012-11-29 at 12.00.17 PM

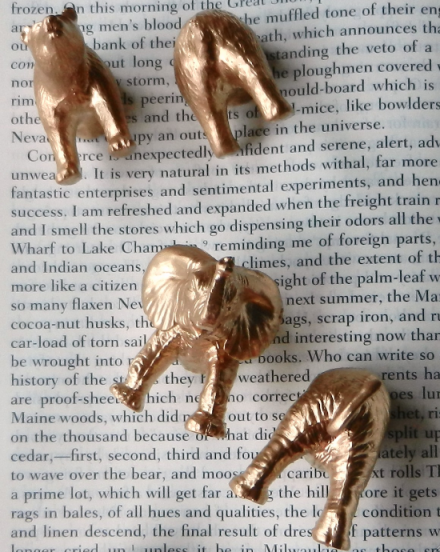
Animal magnets from Juxtaposition

Two more days! See you Saturday!

All that Glitters: a special tree for the Holiday Fair!

General Info, ProjectsElizabeth Ramos

Well, do we ever have a surprise for everyone who plans to attend the Holiday Fair! Last night the Indie Craft Parade staff had quite the crafty get together where we made over 60 handmade ornaments. (I'm not sure the glitter will ever come out of the carpet.) And guess what?! They're all going on an adorable 4 foot tree provided by our friends at We Took to the Woods. And we're going to raffle off the entire tree this Saturday at the Holiday Fair!! Check out this sneak peek at our work.

64618_10152307337340010_866720687_n

Pretty cool, huh? We'll have raffle tickets available at the event. And next week we'll even give you DIY instructions for a couple of the ornaments we made, so you can give it a try.

So if you didn't already have enough reason to attend, you can check out our beautiful tree and purchase raffle tickets to win it.

See you Saturday!

Holiday Fair Gift Guides Part 1

Artist Showcase, General InfoElizabeth Ramos

We're just days away from the Holiday Fair, and we can hardly hold in our excitement! We've made our shopping lists, and I want to share these ideas with you. Here are some ideas for all those special people in your life.

FOR HIM:

Know a creative guy or someone who just appreciates the cool things in life? Be sure to visit these vendors at the Holiday Fair to pick up a gift that will leave you looking awesome!

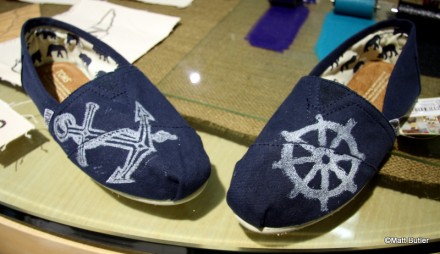
For the socially conscious guy with good taste: handprinted Toms shoes by Matt Butler.

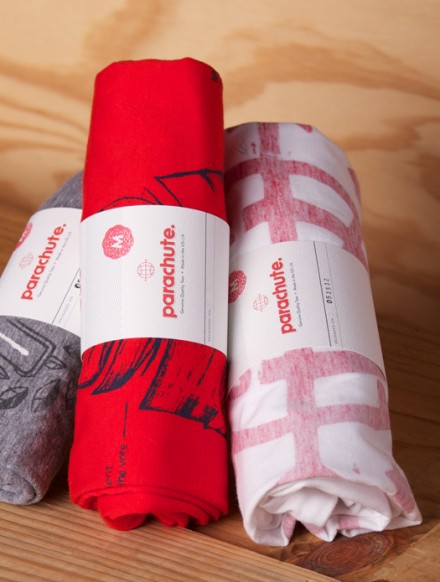
For the guy who loves jeans: Locally printed and designed tees by Parachute Clothing.

CC_8024_1024x1024

For the Perfect Gentleman: hand sewn ties from The Cordial Churchman.

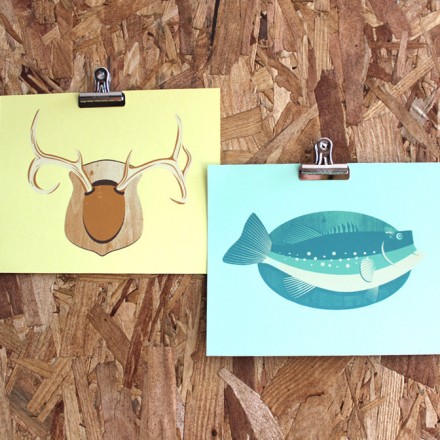
For the Man Cave: prints from Shed Labs.

For the Cycle-phile: prints by Matt Butler.

For Her:

All girls love jewelry, but not just any jewelry...something that sets them apart from the rest. We'll have quite the selection at the Holiday Fair. Plus other awesome fineries for the chicas you know.

For the bibliophile: Leather wrap bracelet from the found'ling.

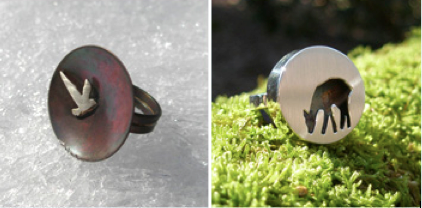
For the nature girl: animal rings from Audrey Laine.

For the Explorer/Adventurer: felt fungi necklaces from Heather Keew.

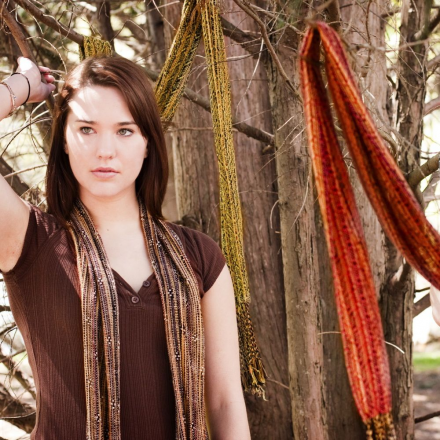
For the Accessorizer: hand woven scarves from Teri Goddard.

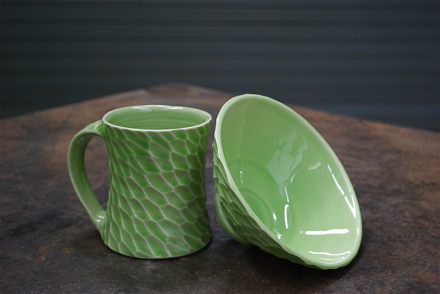
For the Coffee/Tea Connoisseur: hand thrown and carved mugs from Rachel Feece.

Who's on your list? I guarantee we'll have something for everyone! Stay tuned for more guides.

String Art Demo from Dapper Ink

Artist Showcase, ProjectsElizabeth Ramos

A few months ago, we shared our love of string art---that is incorporating string into an existing piece, or creating art entirely out of string. So we were pretty excited when our friends at Dapper Ink (a local screen print and design shop here in Greenville) decided to do a new installation that featured string art. Over the past years, Dapper Ink has hosted installations created by local artists. With the addition of letterpress printing to their shop, however, they wanted to do something that showed off their love for all things print, and the Long Live Print plans began. So check out their behind the scenes video. They've proved that string art (though time consuming) can be an accessible form of art. Maybe this will even inspire you to try it yourself.

http://vimeo.com/53853809

If you're interested in making some string art of your own, Jen from Dapper Ink has shared a few tips:

1) Rather than just going at the project with nails and string, have a plan. We actually printed our design on a banner printer, attached it to the plywood and used that to guide our nail holes. The paper is also great because it keeps your wood underneath clean. Our hands got REALLY messy because of the oxidation on the nails. Chances are you might not have access to a banner printer. No problem...as long as you're not doing a huge installation, print outs from home should work fine.

2) Recruit friends to help you put in the nails. It WILL take you longer than you think.

3) Look at string art inspiration online to give you an idea of how you want to wrap your string, that is, how you want the pattern to look. Do you want it to be very uniform? Or is it ok to be messy and random? Either choice can be fine, but it's difficult to change your tactics once you've started to fill in the nails with string.

4) Use one continuous strand of string or yarn for as long as you can to maintain an even look to the design. However, tie off the ends often. If it starts to unravel, you could lose all of your work to your last tie off point.

Upcycling Vintage Crates and Boxes from Maiedae

Artist Showcase, ProjectsElizabeth Ramos

We've had such an incredible response to Emily's DIY Chalkboard Lettering a couple of weeks ago, I couldn't wait to put up a new guest blog post from another talented lady. Today I'm introducing Savannah Wallace from Maiedae--an artistic, fashion, and lifestyle blogger. Two years ago Savannah and her business partner Jenny participated in Indie Craft Parade as jewelry artists, and I've been mesmerized with their work ever since. Besides her work in jewelry, Savannah is also a graphic designer and photographer. I've been pestering Savannah to do a guest blog post, and fortunately, her busy schedule has allowed her to share this adorable tutorial with us. Thank you, Savannah!

** ** ** ** ** ** ** ** ** ** ** ** ** ** ** ** ** ** ** ** ** ** ** ** ** ** ** ** ** ** ** ** ** ** ** ** ** ** **

DIY: UPCYCLING VINTAGE CRATES & BOXES

Hello friends! Savannah from 

Maiedae

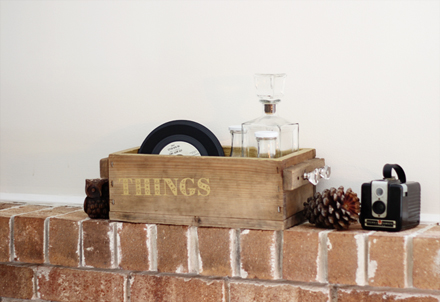
 here to share with you a simple DIY and tips on up-cycling your vintage crates and boxes. Last year I spent some treasure hunting time at local antique stores in search for wooden finds. I found old coca-cola crates, small wooden boxes and a few larger crates. I built up my little collection and have found over the past year that they've served for many uses! I used them as display pieces for my handmades at a craft show, stacked them together to make night stands for my husband's and my pallet bed, put plants on them outside and used them for pretty storage. Today's DIY shows how I used simple elements to up-cycle one of my favorite wooden boxes as a "free for all" things box.

SUPPLIES

* Multi-surface paint - I used Martha Stewart's metallic gold paint.
* Stencil or silk screen - I found a great selection of stencil pieces and some beautiful Martha Stewart silk screen letters at Michael's. You can find things like this at your local craft shop.

* Dresser knobs.

STEP BY STEP

1. Using a drill, make holes into your wooden piece for knobs or hooks. Use these to hang your keys, add a little visual interest or hang other treasured items from.

2. Paint the inside of your crate with a color of your choice to give your box/crate dimension and a little pop or color or metallic flair.

3. Stencil a word or pattern on your box to match its use.

IMG_2721small
IMG_2721small
IMG_2722

Just by getting a little creative you can easily up-cycle any of your favorite wooden antiqued pieces and give it a little extra charm! Try using your favorite colors, fun stencil patterns and trying it out in different places in your home. I love that my "things" box can be used for mail, main floor nick-nacks, make-up and bathroom supplies. So many uses and way more attractive than a plastic bin.

Thanks for having me! Stay warm.

-Savannah

DIY Chalkboard Lettering with Emily Jeffords

Artist Showcase, ProjectsElizabeth Ramos

We've said this before, but one of the best things about Indie Craft Parade is getting to know the awesome people in the maker community. These connections can provide new friendships, networking connections, business opportunities, and they always supply creative inspiration. For this guest post, we called in one of the amazing connections we've made---the ever lovely Emily Jeffords

We asked Emily to supply a project for us...and she did something awesome: DIY CHALKBOARD LETTERING. This is an amazing idea. Who doesn't love beautifully hand lettered designs? And now you can do it yourself!

So without further ado, take it away, Emily!

** ** ** ** ** ** ** ** ** ** ** ** ** ** ** ** ** ** ** ** ** ** ** ** ** ** ** ** ** ** ** ** ** ** ** ** ** ** **

Hello!  I’m so happy to be guest blogging for one of my favorite groups, Indie Craft Parade!  I’m sure you have noticed the growing chalkboard lettering craze sweeping America and Europe right now.  It’s pretty awesome.  Well, it’s awesome if you have freakishly amazing handwriting (which I don’t!)  I can barely write an address on an envelope with grace. Sadly, I’m going to have to leave the hand-lettering to the likes of Dana Tanamachi and Molly Jaques.

The good news: those of us who aren’t Dana Tanamachi can still have amazing chalkboards with freakishly amazing typography and precision (we just need a teensy bit of help from the computer….  Shhh.)

Oh, and lefties, you’re in luck.  Because you don’t have to do one bit of writing, you can work from right to left!  You should have seen me working on this baby upside down, sideways, and backwards!

This chalkboard DIY is so stylish, so trendy, and so, so easy.

Things I leaned during this DIY:

1. Chalkboard spray paint is a total joke.  Just use flat black paint and mix in a tiny bit of clear gesso or unsanded tile grout.  I didn’t try the paint can variety.  Maybe it’s amazing? 2. Really, really, really cover the paper with chalk.  It will save you so much time in the long run. 3. You might want to do a few words with larger text…  not going to lie, this took quite a while because my text was so small (and I’m a bit of a perfectionist.) 4. A small paintbrush + water is like a magic eraser.
I hope this inspires you to have fun creating something amazing and original.

Don't Forget! School Scholarship Deadline Coming Up!

General InfoElizabeth Ramos

Does your child's school need funding for their art program? Well, we want to help. We've put together a $500 scholarship that any Greenville County school can apply for. Last year Brook Glenn Elementary school used some of their funds to work on ceramic clay projects that were pretty adorable.

This is from Laura, the art teacher: I just wanted to send you guys a note and say THANKS for choosing us for your scholarship.  We have been furiously making all sorts of ceramic projects since I was able to purchase massive amounts of clay and glaze (hooray!).  I wanted to send a few pictures.  Two of the pictures are of clay animals third graders have been working on (the most awesome zebra I’ve ever seen!) and one photo is of a stocked kiln room– something that makes this art teacher very happy.

Applications are open until October 31, so please let all of the art teachers in your life know about it. For the full details, check out this blog post. And for the application check here.

DIY Round Up: Handmade Notebooks

ProjectsElizabeth Ramos

Well we haven't done a crafty round up since before the festival, so I'm really excited to share what I'm finding inspiring right now. I've recently been hunting for the perfect notebook. Pads of paper that fall apart just aren't cutting it anymore. I love, love the designs coming out of Rifle Paper Company, but I think I might be good and make one myself...we'll see. I think these notebooks might be right up my alley, maybe yours too. The tutorial for this little journal/notebook from Elle's Studio looks simple enough but still super cute. They used patterned paper and chipboard to create a book that would also make a great album or daily scrapbook.

Screen shot 2012-10-03 at 2.48.43 PM

Magenta and Gold? Yes, please! Whitney of Eat, Sleep, Cuddle used scrapbook paper and gold leaf to make this awesome design.

OLYMPUS DIGITAL CAMERA

Making a stamp from a lino block is a great way to create some one of a kind art as well as a functional piece. Check out the tutorial from A Pair of Pears.

Or, if you want to go super basic and still say, "I made this," then this kit from Curious Doodles could be perfect from you. The embroidery is just awesome, and the book is the perfect size.

Indie Craft Parade Presents The Makers Summit!

General InfoElizabeth Ramos

For the past few months we've been working on the next big thing for Indie Craft Parade, and today we're so excited to share it with you. If you attended Indie Craft Parade this year, you may have heard a little about this already, but here's the official announcement. The Indie Craft Parade mission is to empower the creative community by cultivating a knowledge and respect of handcrafted goods while providing valuable resources to independent artists. We're always looking for ways to benefit those in our industry, which is the impetus for our very first Makers Summit. It's a one-day conference focused on art, craft, and design and jam-packed with golden information to either start or grow your small business.

TMS logo

Join us February 2, 2013 to learn collaboratively through panel discussions, one-on-one sessions and keynote speeches from industry experts like Stephen Fraser, founder of Spoonflower. Conference tickets are $100 and include breakfast & lunch.

Besides an incredible day of creative business sessions, we're finishing off the conference with The Best Craft Night Ever!  The Makers Summit Afterparty is a great time to mingle with both peers and experts over dinner, followed by a time of making! The party is separate from the conference and tickets can be purchased for $50.

We have so much more to tell you about the Makers Summit, so stay tuned! Our website will be updated with all of the information in the next couple of weeks. Mark your calendars!

Fast Stats: A look at Indie Craft Parade

General InfoElizabeth Ramos

Well, it's hard to believe it, but we are closing the books on the 2012 Indie Craft Parade festival. BUT we have so many amazing things planned for Indie Craft Parade in 2013...including a big reveal this upcoming Monday! But this year again, we've recapped our festival using a beautiful graph making site called Daytum. Got data that you need to look amazing? Check them out.

For the full set of statistics, visit our Daytum listing.

Indie craft parade in review: the goodies!

General InfoElizabeth Ramos

I have a final round of photos to show you today, all provided by local bloggers. We're so thankful for their support in spreading the word. Today's pictures all center on my favorite part of Indie Craft Parade---the goods we all took home. I thought my personal shopping experience was better than ever this year, and I get the feeling these bloggers would agree. Check it out.

Let's start with some of my personal loot:

Felt Bonsai by Once Again Sam

Cut metal necklace from Ashley Buchanan

Collage from Emily Jeffords

And from our blogging friends:

From Elizabeth Ramos: Clockwise from top: Screenprinted set of 4 napkins from Tiny Peepers / medium bowl from Jeanette Zeis Ceramics  / inside, three soaps from The Herb Garden, a necklace from Spectrum, and my first Finkelstein creature! / letterpressed tags from Concrete Lace / hand-lettered, letterpress cards from Ink Meets Paper  / The New Empires latest album / Tea towels by Chomp Textiles  / letterpress coasters from The Gilded Fete / Metal bangles from Lily / an extra bright Spectrum bead

I love this look from the Baintons: Tee from Parachute, skirt from So She Sews , Necklace from Once Again Sam

From Barb Blair of Knack Studio: animal place cards from the Gilded Fete

From 17 Dove Streetfiber art piece by Heather Keew / lavender hand soap by Whispering Willow/ carved porcelain bowl by Rachel Feece Pottery / fabulous figurines by The Runny Bunny

From Beautiful Spoon: Instrument postcard from Quill & Arrow Press, banjo kitchen towel from Tiny Peepers, and postcard set from Marisol Spoon.

From Oliver's Fancy: quilt and covered journals from Stitched in Color; handmade napkins from The High Fiber, and illustration sketchbook from Cory Godbey

Hope you had as much fun shopping as we all did!

The 2012 Indie Craft Parade School scholarship

General InfoElizabeth Ramos

Since we started Indie Craft Parade, we’ve wanted to do more than just put on a great show in Greenville. We want to make a lasting impact on our community. One of the hopes for Indie Craft Parade is that we can inspire another generation of artists by getting involved with the art programs of Greenville County schools. Last year we established the Indie Craft Parade School Scholarship Program in which we donated funds to the art department of a Greenville County school. We understand that school budgets are always tight, but unfortunately it is often the fine arts programs that are the first to suffer when  funding cuts are made. It also breaks our hearts when we learn that art teachers sometimes have to pay out of pocket to supply the most basic tools like markers and crayons for their classes.

So we want to help.

Our goal is for the scholarship program to not only help fund a school’s art program that is lacking in resources but also expose students to a greater spectrum of art than is typically available in a classroom setting.For 2012, one scholarship of $500 will be awarded to a school in Greenville County.

Application photos from last year's winner Brook Glenn Elementary.

We want our scholarship to extend beyond just funding. We hope to establish a true partnership with the school that is selected and work together to create opportunities for students and local artists to connect. This may include demonstrations, assemblies or field trips.

Applications will be selected based on three main criteria, including: Educational impact of the scholarship Need of the applying school Proposed use of the funds

Any school located in Greenville County can apply for these art program funds. Applications can be found online and must be submitted by October 31.  So let your school know about this opportunity! Read all the details about this program at our Scholarship Webpage.

The Indie Craft Parade scholarship is open to all schools, both public and private, in Greenville County. All schools are eligible for funding without discrimination due to race, religion, or socioeconomic status.

Indie Craft Parade in review: Hanging with the vendors

General InfoElizabeth Ramos

We couldn't put on a successful event without the word of mouth information that people pass around. This is why we're so thankful for the bloggers, facebook fans, and contributors to our Flickr page who share their love of indie craft with everyone else. Today I have another round of photos to share. This time we're looking at the specific work and booths of the vendors themselves. Again, all these photos are gathered from bloggers who attended our event. Thanks again, guys!

ICP1

Check out more of Elizabeth's work at her shop in town! Image courtesy of Yellow Elm.

after

Booth of the ever lovely Emily Jeffords. Image courtesy of Beautiful Hello.

IMG_5899[1]

Yes we did have custom printed Toms! Booth of Matt Bulter. Image courtesy of Gap Creek Gourmet.

Fun at Ivey Handcrafted. Image courtesy of The Best Laid Plans.

The plushest, sweetest toys ever from Finklestein's Center. Image Courtesy of Liza Jane Sew.

Booth shots of Lily Pottery, Joseph Bradley, Ink Meets Paper. Image courtesy of Beautiful Hello.

Quilts and other goodness from Rachel. Image courtesy of Stitched in Color.

Indie Craft Parade in review: a look at the event

General InfoElizabeth Ramos

We're back! Thanks for your patience while we recouped our strength after a long crafty weekend. Now it's time to share all of the fun we had. We'd like to start with a round of thank you notes to the various bloggers who have recapped our event. They've kindly shared their pictures with us, and we'd like to share their blogs with you. If you like what you see, be sure to follow the links to their sites. You'll find a whole new realm of inspiration.

Today, we're featuring a round up of photos about the event in general. There's plenty more to come. Thanks so much to all of the bloggers who contributed!

551676_10152071194365462_1293877426_n

Indie Craft Parade tee shirts, literally hot off the press. Printed at Dapper Ink. Image courtesy of Light Night Rains.

Screen shot 2012-09-19 at 10.18.40 AM

A look at the "daunting but well-worth-the-wait" line to enter the event. Image courtesy of All Mapped Out.

DSCN2634

Entering the festival. Image courtesy of Daily Dzynmkr.

t-shirt

We love this slogan! Image courtesy of The Baintons.

Image courtesy of Liza Jane Sews.

tumblr_ma3d9meSnY1r72z4r

Show those guns! Image courtesy of The Baintons.

Craft brewed coffee by the Vagabond Barista. Image courtesy of Ink Meets Paper.

3c8a41b4f96611e185b022000a1cdc2f_7

The hustle of the lobby. Image courtesy of Oliver's Fancy.

Making cut-and-sew Hugos provided by Spoonflower Fabrics. Image courtesy of Good Morning Darling.

tumblr_makk23BLwj1r6lrg4

Fun Oh Snap! photobooth shots. Lots more of these to come. Image courtesy of Life Without TV.

Thanks for an amazing event!

General InfoElizabeth Ramos

Well, our third annual Indie Craft Parade was a smashing success! We had a fabulous weekend with our vendors and attendees, and we can't wait to tell you all about it. We're going to be taking a short blog break to gather all of the stats (and recover our strength) from this weekend. We'll return shortly with recaps, pictures, and many many stories about the festival.

See you soon!

What to expect at Indie Craft Parade

General InfoElizabeth Ramos

You might be wondering what you as an attendee can expect at Indie Craft Parade, so hopefully this post will answer all your questions!

Who is this festival intended for? The whole community! Indie Craft Parade is for anyone interested in purchasing handcrafted goods. Indie Craft Parade features the best handmade art in the Southeast from 75 independent artisans. We invite the public to attend this festival and enjoy high quality crafts, local food, live music, and getting to know the artists in their community.

When is the 2012 Indie Craft Parade? This coming weekend, September 7-9. The VIP Gala is Friday night from 6 - 9 pm and is for ticket holders only (see details here).  The rest of the festival is free admission, and is open Saturday from 9 am-6pm, and Sunday from 11 am-5 pm.

Where is the festival being held? Indie Craft Parade is held indoors at the historic Huguenot Mill in downtown Greenville, SC. The mill is located at 101 W. Broad Street, next to the Peace Center. The venue is handicapped accessible. There is street parking available, and several parking garages with easy walking distance.

Is this event family-friendly? Absolutely! Saturday and Sunday are both free admission, so bring the whole gang. If you've got small children, we suggest you leave your stroller at home if possible. The aisles are a bit narrow, and can make maneuvering a stroller a little difficult. The only time alcohol will be served is at the VIP Gala, and attendees must be 21 years or older to partake.

What type of goods can I expect to see? At Indie Craft Parade, you'll find the best handcrafted goods in a variety of categories, everything from paintings to children's toys, paper goods to jewelry, ceramic mugs to artisanal chocolate. You can get a sneak preview of some of the work by checking out blog posts like this one or this one.

Will credit cards be accepted? Maybe. This is primarily a cash event. Many of the vendors may have the ability to accept credit cards or checks, however you should be prepared to pay cash for most of the items you purchase. There is an ATM on site in case you forget your cash.

Photo by Britt Hildreth

Will I have to wait in line? It's possible. We've expanded our hours and added an extra day to better accommodate the crowds, but depending on the turnout, you may have to wait in line before you enter. Obviously, our goal is to get everyone in as soon as possible, but we do have to respect the venue's fire code. If there is a line, we'll do our best to keep it moving quickly, and aim to have everyone in within about 15 minutes. If you'd like to avoid the line, you should attend our VIP Gala!

Is there food and drink on site? Yes! We're delighted to have the offerings of several local establishments available to our attendees. You can purchase items from The Chubby CupcakeO CHA Tea Bar,The Bavarian Pretzel Factory, and Swamp Rabbit Cafe and Grocery on Saturday and Sunday. Our VIP Gala guests will receive complimentary food and drink from The Community Tap,Vagabond Barista, and Chef 360.

If you have any questions, please check out our FAQs. Or, leave a comment below and we'll reply!

Sponsor Feature: PayPal

General InfoElizabeth Ramos

We have one last amazing sponsor to tell you about: PayPal! PayPal has come on board to supply a host of tools that can make our lives and businesses better. We all know about electronic card readers. People hook them into their smart phones and tablets to get paid on the go. (I've even used an electronic reader to pay back friends). These inventions are great, and PayPal now has it's own system called PayPal Here. PayPal has the best rate on the market when you use PayPal Here. You now can accept checks, email invoices, access your funds almost immediately, and multiple people can use the account (Yay!)

When you attend Indie Craft Parade, be sure to stop by the PayPal booth to learn how they can make your financial life easier.

http://www.youtube.com/watch?v=x5woIGSOLGk