Projects,Behind The Scenes,Behind The Scenes,Behind The Scenes

Thanksgiving DIY Round Up

ProjectsElizabeth Ramos

Thanksgiving is my favorite holiday. I love that it's not over commercialized. I love the time spent with family. I love the traditions we've made over the years--Oh and the food. This girl has a Southern family that can cook like nobody's business. Perhaps the only thing I don't love is our lack of great decor for the Thanksgiving holiday. Admittedly, I put so much more effort into decorating for Christmas, that I feel Thanksgiving gets ignored. Well, not this year. I've got just over a week till turkey day, and I'm loving some of these DIY projects I'm sharing today. I hope you will find these as inspiring as I do!

These linen napkins from The Purl Bee seem so easy to make, and I think they're quite beautiful with this ombre look.

I've seen a lot of ways that people count and record their blessings, but this might be my favorite. I love how the tutorial from Craftzine.com uses chalkboard paint "leaves" for Thanksgiving guests to write on. I think this project would be especially fun for kids to get involved.

I love this idea as an alternative to place cards. Elizabeth Anne Designs salvaged vintage spoons and hammered guests' names into them. They look so pretty with a finished table setting.

Ok, I've seen countless cake toppers. But a pretty pie topper--Who knew? I think pies are generally under-appreciated, and this swag from Oh Happy Day just makes me smile.

DIY Round Up: Scrap Fabric Projects

ProjectsElizabeth Ramos

Happy weekend everyone! I've got a DIY round up today that's particularly dear to my heart. I love fabric. I practically collect it, which gets me into trouble particularly when I piles of scraps to deal with. I can't throw them away. There's always something more that you can squeeze out of them. So while jewelry making is usually the fate of my scraps, I've come across a number of adorable projects that might require me to dig deeper into the scrap bin. If you don't have a fabric fetish like me, you probably still don't need to go out and by any for these projects. Old tee shirts, blouses, sweaters and even neckties usually make crafting fabric.

Craft away!

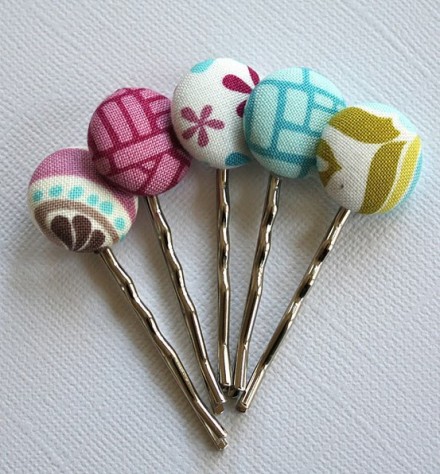
How cute are these covered bobbies? You'll have to buy the hardware for this project, but this tutorial from Christina Williams spells everything out nicely.

These fabric feathers featured on 100 layer cake are easy to make and so versatile. They'd look great as hair pins, gift wrap embellishments or little pops of texture in a flower arrangement.

Need a functional and still cute way to contain your fabric scraps (or anything else for that matter)?  The Sometimes Crafter put together a great tutorial that will keep you from using your good tupperware to organize your odds and ends.

Tattered fabric roses, though not a new craft, still have an elegant charm. My favorite thing about them: you can use them to customize just about anything. Pin them onto bags or coat lapels; stitch them onto cardigans or scarves. Everyone will be amazed when they find out you did it yourself. Tutorial found on Everyday Chaos.

Autumn Craft Round Up

ProjectsElizabeth Ramos

Happy first day of fall everyone! This is officially my favorite season. I love it all--the colors, the fashion, the food. And I totally plan on spending part of my weekend making some autumn inspired crafts. Here's a few great ones to consider. Have a great crafting weekend!

Fabric pumpkins from ever creative Martha Stewart team. I love the color combination of plum, velvet, and metallic fabrics.

Leather leaves necklace--a super cute DIY from Missie Krissie

Not your average book-pressed wildflowers. I love the combination of the pressed flower with vintage book page and frame. Tutorial courtesy of Country Living.

Have acorns scattered across your yard? Turn them into a wreath for your front door. I love the brilliant green color Katie Miller chose to paint the acorns.

2011 Photos

Behind The ScenesElizabeth Ramos

Our 2011 Indie Craft Parade Flickr pool is filling up fast with great photos! Have you added yours yet? Here's some of our favorite photos so far...

web_370-2_metromix

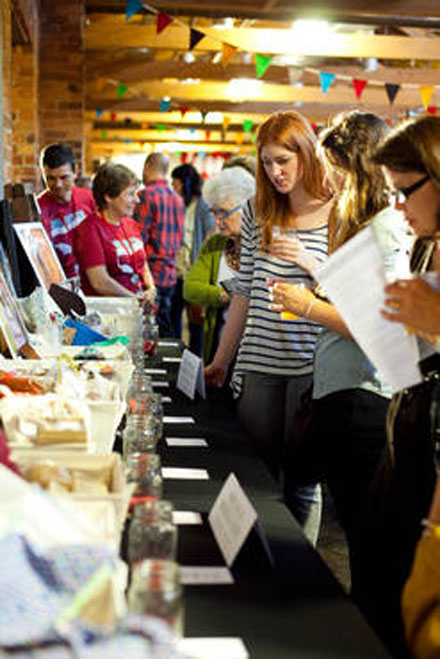
VIP Gala attendees shopping, photos by Metromix's Angela Cox.  See their full slideshow here!

VIP Gala attendees entering the giveaways, photo by Metromix's Angela Cox.  See their full slideshow here!

ICP exhibitors MaieDae, photo by Metromix's Angela Cox.  See their full slideshow here!

Local bluegrass band, The Bent Strings, photo by Peter Crane.

Parachute Clothing, photo by Peter Crane.

Leslie DeRose, photo by Peter Crane.

Lily Pottery, photo by Peter Crane.

ICP attendees shopping, photo by The Greenville News' Heidi Heilbrunn.  See their full slideshow here!

Free photobooth in use, photo by The Greenville News' Heidi Heilbrunn.  See their full slideshow here!

Owlette Collective, photo by The Greenville News' Heidi Heilbrunn.  See their full slideshow here!

Fox to the Opera, photo by The Greenville News' Heidi Heilbrunn.  See their full slideshow here!

Caleb Chancy, photo by The Greenville News' Heidi Heilbrunn.  See their full slideshow here!

ICP sign, photo by Jennie Raff Photography

canoo, photo by beautifulspoonjenni

Check out the rest of the 2011 Flickr pool and add your photos!

Indie Craft Merchandise

Behind The Scenes, General InfoElizabeth Ramos

Photo by Heidi Heilbrunn, The Greenville News

We had so much interest in the goods at our Indie Craft Parade booth that we've set up a (very) temporary online store for a few of the most popular products. Since we sold out of the red Indie Craft Parade shirts on day two, we'll be printing more for those who missed them. The two Indie Craft Parade tees pictured above and our Buy Handmade totebag will be available to order online, but just until next Sunday, September 18th!

Note: If you pre-ordered your shirt at Indie Craft Parade, you don't need to submit another order. You should have already received an email from us detailing the completion of your order.

Sneak Peek: Giveaways!

Behind The ScenesElizabeth Ramos

We've mentioned the fabulous giveaways that will take place on Friday night at the VIP Gala, but here's a sneak peek at some of the items that you could win!

Isn't the work just wonderful? And that's just a sampling of the prizes, there will be lots more that our VIP guests will be eligible to win.

The exhibitors have donated these items, and we'll be bundling them into groups. Each VIP ticketholder can choose which group they would like to win, and we'll announce the winners that night! Since attendance is so limited that night, the chances are great! You could be walking away with some fabulous prizes worth much more than your ticket price. If you want to get in on this action, make sure you get a ticket to the Gala!

If you can't make it Friday night, don't worry... Saturday and Sunday will be a blast too!

Featured Sponsor: Ribault St. Catering

Behind The ScenesElizabeth Ramos

We are so excited to have the support of Ribault St. Catering! This local independent catering service provides the ultimate culinary experience for corporate and social events. Their restaurant, Two Samuels, is located in Spartanburg, SC and serves upscale offerings of American cuisine.

Ribault St. will be providing the food for our VIP Gala, which means this is a night your taste buds won't want to miss! You can purchase your gala tickets right here, or enter to win them in our giveaway.

All photos courtesy of Ribault St.

Be sure to check out Ribault St. online or in person at our VIP Gala!

Our Mascot by Three Bad Seeds

Behind The ScenesElizabeth Ramos

You've probably seen our adorable mascot around, a happy little elephant named Hugo. We recently asked one of our fabulous vendors from last year, Three Bad Seeds, to bring him to life... er, plush. Amanda Weiss, felt hoarder and doodler extraordinaire, came up with four amazing versions of Hugo... and I can't keep from smiling when I see them!

Don't you just love Hugo! The red and white versions will be on display at the Indie Craft Parade booth, and we'll lend the black and white ones to the photobooth as props.

Be sure to check out Three Bad Seeds and Amanda's post about our little elephant friend!

Featured Sponsor: Coffee & Crema

Behind The ScenesElizabeth Ramos

We are so excited to have the support of a local independent coffee shop, Coffee & Crema. They, along with coffee experts Ben Szbody and a representative from Counter Culture Coffee in Atlanta, GA are sponsoring our VIP Gala. All VIP Gala ticket-holders will receive complimentary coffee prepared by their masterful hands.

While espresso bars are now very well known, much of the real attentive craft coffee movement is now gravitating toward simple brew methods that produce sparkling, delicious "black" coffee. Coffee & Crema will be showcasing three of these brew methods at the VIP Gala, along with 3 very special coffees.

One of the brew methods to be featured is the syphon method (pictured above). This set-up is certainly eye-catching, I'd never seen coffee brewed in such a beautiful way! Not only is it lovely to watch, the syphon produces a cup of coffee that is clean, crisp, rich, and smooth. Check out Coffee & Crema's awesome video below to see the syphon in action.

The Syphon Project from Jacob Forrest on Vimeo.

If you'd like to be one of the lucky few to partake in the coffee wonderland at the VIP Gala, get your ticket here!

Thanks so much to Coffee & Crema for their support of Indie Craft Parade!

DIY Round Up: Fun Paper Crafts

ProjectsElizabeth Ramos

I don't know what your plans are for this weekend, but mine will be spent crafting up a storm for a friend's wedding. I'm making a paper and vellum garland, which I'll show you at a later date. But all my work with paper inspired me to share a few paper more paper crafts that I'd love to tackle. Hopefully you'll find some time to craft this weekend...particularly if the crazy hot South Carolina weather continues to keep us all in doors.

Recycling paper bags and other odds and ends into cute, cute wrapping paper; Courtesy of A Creative Mint.

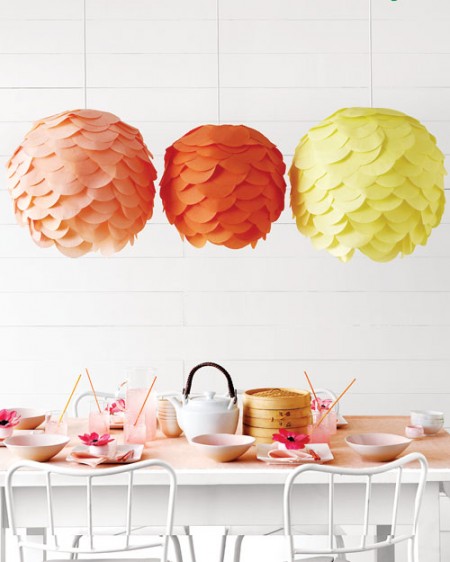
Decorative Paper Lanterns; Courtesy of Martha Stewart.

Dip Dye Paper Cups; Courtesy of Design*Sponge.

Do It Yourself: Creative Wall Covering

ProjectsElizabeth Ramos

New DIY Project for you. I learned  about this one while at the craft night we hosted a couple of weeks ago. Melinda, one of our participants, recently moved, and she was looking for a creative way to fix an unsightly wall in her bedroom. The previous renter had torn up the some of the wall, and there were bits of peeling paint all over the surface. So Melinda came up with the bright idea of using this tutorial to make tissue paper flowers from vintage sewing patters. Compiling the flowers with other odds and ends from the thrift store, she put together quite a lovely display and managed to cover any ugly splotches in the process. Thanks for sharing the paper flowers and the finished product!

Making the paper flowers at the Etsy Craft Party.

P1130083

The Materials:

Various sizes of tissue paper flowers

Thrifted frames (contents and glass removed), spray painted a pearly off-white--some of the frames she filled with coordinating craft paper which turned out super cute!

Small nails for hanging the frames--1" nails for lightweight, empty frames work fine

Wall safe sticky tack--a tiny bit for holding the edges of the frames level

A level

Thumb tacks

Blogshot1

The wall, tastefully covered.

The Process:

First Melinda laid out all of the frames on the floor to see which arrangement she liked best. It's always a good idea to play with composition before you start nailing things to the wall. After she tacked the frames in place and made sure they were level, she thumbtacked the paper flowers over the nasty wall splotches to hide remaining evidences of peeling paint. The entire project was quite easy, about 4 hours from start to finish. And it looks absolutely great!

Do It Yourself: Herb Gardening

ProjectsElizabeth Ramos

The DIY ethic is the heart of America's craft movement. This ever growing spirit of "I can do that" inspires people to better living where they waste less and frequently spend less. Indie Craft Parade whole heartedly embraces ventures that help people become more independent, so we're going to include a series of posts where we help you make your own accessories and home decor, or enhance your life using tools you already have, or as in today's post, help you grow your own food. Now I'm not talking about becoming independent of the food industry or even digging up your backyard to plant a full vegetable garden. We're starting at the simplest level of food provision--planting an herb garden.

Photos courtesy of this post from the very inspiring photography blog From Me to You.

I love herbs! I have a small container garden just off our back porch, and few things make me happier in the summer than clipping off those fragrant greens to stir into dinner at the last minute. The best thing is, many herbs are ridiculously easy to take care of (even for us with the blackest of thumbs), and making a little container garden is so stinking cheap! For the price of buying fresh herbs at the grocery store, you can make an herb planter that will last you the entire season. Herbs also provide some basic health benefits. They're a great way to add flavor while cutting back on fats and salt.

You probably already have most (if not all) of the materials you need for starting your own herb garden. But here is a basic list:

1) Small containers--at least 6" in diameter so your plants have room to grow (recycled cans with holes poked in the bottom work great if you don't already have cast off flower pots)

2) Fine potting soil

3) Seeds or starter plants--this late in the season, I would definitely recommend starter plants

4) A sunny spot such as a porch, patio, or even a window sill that receives a few hours of good sunlight every day

5) Watering device--herbs don't need a ton of water, but they do like to have it consistently (if you want to get all fancy, you can buy an inexpensive watering systems at your local hardware store)

Now, I'm by no means a knowledgable gardener, but I have had great luck with my herbs. Here is a list of herbs that I have found to grow well in the hot summers of South Carolina: Basil, Rosemary, Oregano (mine comes back year after year now), Thyme, Parsley, Tarragon, and Mint. I have NOT had any luck with Cilantro or Chamomile. I think the heat just does them in too early in the season.

Hopefully you're inspired to go out and try a little gardening of your own. Here are a few parting tips that will make your experience even better.

If you don't mind doing a little research, the Clemson Extension website has this awesome guide on growing and harvesting a variety of herbs.

Weekend Fun: Crafting Party

ProjectsElizabeth Ramos

Thank you every one who came out to our craft party on Friday night. We had such a good time meeting new Greenville crafters and reconnecting with ones we already knew. And the crafts...we had super cute paper wreaths and flowers, fused glass, father's day cards, as well as handmade baby and bridal shower decor to show off at the end of the night. Stay tuned, we'd love to host another party in the future. You'll want to be there when we do.

To see the rest of the pictures from Friday night's fun, check out our Facebook album.

Don't Forget! Craft Party Tomorrow Night!

General Info, ProjectsElizabeth Ramos

Crafty Gathering Found on 100 Layer Cake

Friends of Etsy and Indie Craft Parade are gathering at Dapper Ink tomorrow night for an evening of making crafty goodies. Please join us --even if you don't have a craft to work on. We're bringing some inspirational craft books as well as some card making/collaging supplies to share. RSVP here!

Hope to see you there!

7-10 PM; 207 Wade Hampton Blvd., Greenville, SC 29609; 864-551-3115

Worth a Thousand Words: Impressive Product Photography with Very Few Tools (Part 1)

Behind The ScenesElizabeth Ramos

When selling or displaying work online, whether in a venue like etsy.com or even for our jury via the online application, you really only have one way to impress your audience--great product photography. Unfortunately, no matter the quality of your crafts, they won't catch people's attention unless you capture them just right through a lens. So to give you an inside tip on how to impress the jury...and everyone else with your work, I've put together a two part post on how to gain the upper hand through good product photography. Today we'll discuss the elements of lighting and staging, and next time we'll talk about using your camera to the fullest as well as give a few editing tips.

Lighting Techniques

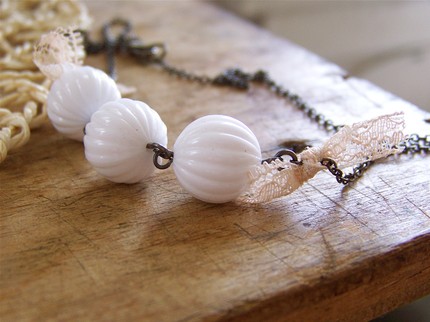
First (and perhaps most important), let's go over a few techniques for lighting your work properly. Here are two basic rules to follow: 1) Never use harsh, direct lighting. 2) Never use an unfiltered flash. Look at the examples below. You can see the example necklace shot in three different light settings--harsh direct light, low light with a flash, and set up in a light box.

Example Front Lighting

You can easily see which quality of picture is best--and therefore which picture is most likely to sell the product. The harsh, direct lighting creates garish shadows around the necklace that really distract from it and using a flash mutes all of the details in the necklace, creating a generally muddled and discolored photo.

For best results with controlled lighting, you should shoot your products in a light box--a translucent cube that evenly disperses light around the object. Light boxes transform narrow beams of light into broad, big light which softens shadows and gives a pleasant, even tone to the photograph.

Now I realize that most of us aren't that serious enough photographers to go out and buy a light kit. So through a great tutorial (and using products I already had at home), I made this DIY light box in about 20 minutes and for absolutely free. Once I made the light box, I used two desk lamps to light the necklace shot above. The whole process was quite simple. I spent the most time just fiddling with lamps to find the best lighting angles. I found that jewelry is usually best lit from the top. You might also have to adjust the diffuser panels (in my case, waxed paper) according to what you're shooting. For the ceramic mug I photographed (below) I taped an additional piece of paper directly above the mug, inside the actual light box, to create the lighting I wanted.

If you don’t want to go through the trouble of making a light box, here are a few other tips to create the desired look:

1) Shoot in soft, natural light. If the morning light through your window is too strong, wait until the afternoon to shoot. If the sunlight coming through your window is too direct, you can help diffuse it by hanging a sheer panel.

2) Just like when using a light box, you'll have to play with the relation of the sunlight to your product. Changing your position will affect the shadows and color of your photo, so take pictures from multiple angles to see which you like best.

3) If you have an object too big to fit in a light box or on a tabletop, you'll probably need to shoot it outside in closed shade, like on a porch.

Staging Products

Second, let's talk about staging or how you position your items to be photographed. Now, you don't have to create an elaborate stage for your items. Many product photographers prefer not to. There are pros and cons to both. For example, look at the pictures below. Which would you prefer to buy?

One the table top, the necklace looks like it might be right at home on your dresser. However, in the light box, you can get a better look at the whole product.

If you choose to stage your crafts for photography, here a few guidelines and ideas:

1) Choose a simple background--especially if your products are small. I like how this photographer foiled her jewelry with the brightly colored card stock. I think it really makes the silver pop.

2) If you are going to include other objects in the photo besides your craft, make sure they enhance the overall feel of the photo and never detract from what you're actually trying to show off. For example, I shot the ceramic mug below with items that naturally associate with coffee--whole beans, a napkin, cinnamon, etc. But I made sure that the focus of the picture remained on the mug.

3) Position your products creatively or to show off their best angles.

4) If you want ideas for staging your specific craft, check out this website. It gives a lot of good tips for different craft items.

Here are some parting examples of staged products that I really like. For further reading, check out some of the links below in my shout-out section. Happy photographing!

Shout-out to more wonderful sources that made this article possible:

My friend and local photographer, Philip Eoute.

Design*Sponge Biz Ladies

Indie Made

Oh My! Handmade Goodness

A Fine Tooth Comb