Tips & Tricks,Projects

Inspiring Booth Displays

Tips & TricksElizabeth Ramos

From now till Christmas many of our Indie Craft Parade followers will be busy with craft shows. Some of you are old pros at craft fairs and have mastered the art of displaying your goods. Others might be new to the craft circuit and are still figuring out the art of presentation. So I've gathered some tips using some of the booth displays at Indie Craft Parade. While we didn't have a single weak display at the event, and all of them were great examples of quality booths, I've chosen to highlight a few that demonstrate some good pointers for showing off your work.

Displaying two dimensional art can be difficult. Joey Bradley opted for a wall display instead of a table. I love how clean his booth is and how he incorporated some large objects that coordinate with his subject matter to break up the visual space.

Illyria Pottery's booth was a show stopper. While you might not need this much height on your table, it works well to have something visually striking about your booth to draw the visitors in.

If at all possible, show off your wearable goods (clothing, jewelry, purses, aprons, anything!) on dress forms or mannequins. The visitors to the Parachute Clothing booth had an easier time seeing the size and fit of the items as well as imagining themselves wearing Parachute goods.

Maie Dae really created unity with her booth. Since many of her jewelry goods were vintage or upcycled items, her booth reflected that theme using recycled crates and boxes or old door knobs.

For even more inspirational booth ideas, browse the 2011 and 2010 Indie Craft Parade Flickr pools!

Autumn Craft Round Up

ProjectsElizabeth Ramos

Happy first day of fall everyone! This is officially my favorite season. I love it all--the colors, the fashion, the food. And I totally plan on spending part of my weekend making some autumn inspired crafts. Here's a few great ones to consider. Have a great crafting weekend!

Fabric pumpkins from ever creative Martha Stewart team. I love the color combination of plum, velvet, and metallic fabrics.

Leather leaves necklace--a super cute DIY from Missie Krissie

Not your average book-pressed wildflowers. I love the combination of the pressed flower with vintage book page and frame. Tutorial courtesy of Country Living.

Have acorns scattered across your yard? Turn them into a wreath for your front door. I love the brilliant green color Katie Miller chose to paint the acorns.

Making the Sale: Interview with Katie Coston

Tips & TricksElizabeth Ramos

For many artists, creating great work is the easy part. It's selling their work that gets difficult. So we asked Katie Coston, a professional, full-time potter, to share some tips for increasing your sales at Indie Craft Parade or other venues. Katie's one-of-a-kind pieces sell extremely well at her shows. But it's not pure artistic talent that's brought Katie and Illyria Pottery success. Her winning personality and experience keep her customers coming back. Indie Craft Parade: How do you first engage people when they come to your booth or to a show?

Katie: Engage customers just like you would engage with anyone anywhere. Be friendly and genuine. If they are coming to your booth, remember that something has drawn them. Maybe it's you. Maybe it's your work. If they seem like a "leave me a alone, and let me shop" kind of person, I usually tell them to let me know if they have any questions, and I get busy doing something else.

4997311223_bb8a837555

Katie's Booth at 2010 Indie Craft Parade

Indie Craft Parade: Generally people don't like being pressured into buying things, but as the artist, you have to make the sale. How do you convince people they need your goods without being too pushy?

Katie: I strongly dislike pressure from sales people. Actually, if a sales person is hovering, I tend not to buy. Since that's how I feel, I assume others are similar. I like to welcome people, and then let them shop. If they seem interested in something, I'll often come back and mention an alluring feature or interesting fact about the piece they're holding. Micah (my husband) and I work as a team, and he can get away with "chatting people up" (as our British friends would have it) more than I can. He knows about the process and has been involved enough to have a connection with each piece. His personality is naturally social, and it works for me to have him talk about my work, since I don't want to sound like I'm singing my own praises. If you're on your own, I guess you'll need to find a middle ground, and/or bring a friend along who loves your work. It's better to not make the sale the first time around than to give your customers a reason to not come back.

Indie Craft Parade: You have a lot of repeat customers that come to your shows, visit your online site, etc. How did you develop that faithful following?

Katie: We try to always keep things fresh--our displays, pieces, and even venues. Certain things are standard, but we don't like to stagnate. If I have something that's been around, I get rid of it anyway I can. Who wants to come to your next show and see the same things you had last time? Be personal and real. Show genuine interest in the individual and not their wallet. Get to know your customers and find out what excites them.

Indie Craft Parade: Any other tips you like to share?

Katie: Selling can be difficult. A good solution is to be just as creative in your marketing and selling as you are in your creating! Have a wide variety of pieces in a broad range of prices. I aim to always have something available for that college kid who can only spend $10 or that mom who can't go over $20. I do have customers that will by $100+ pieces, but I try to be realistic and have options for various needs, tastes and budgets. With each item ask yourself, "Would I buy this piece for this price?." Be honest! Chances are a lot of other people think like you do.

Thanks, Katie! Be sure to check out her work and online shop at Illyria Pottery.

Perfecting your Art: Interview with Cory Godbey

Tips & TricksElizabeth Ramos

The world of arts and craft is competitive, and it takes a great deal of time and effort to make your work stand out. That progression can be long and difficult, sometimes fraught with criticism and even rejection. But for the people willing to stick it out, the end is rewarding. We've brought you an interview with Cory Godbey, a Greenville artist who's spent a number of years making a name for himself in the illustration community. Having experienced both the ups and downs of perfecting his art, Cory understands the dedication and perseverance required of a professional artist. Still on the journey (but having come a long way) he has shared some advice and encouragement for artists who are continually striving to improve their work.

Indie Craft Parade: As a professional artist, you've worked for a number of years on perfecting your techniques and personal style. What do you think was the most important thing to focus on during those growing years?

Cory: For me it's always been a matter of working hard. Working hard and wanting it. It's also competing with yourself, I believe. Of course you can get discouraged looking at all the awesome things everyone else on the internet is doing. But remember to keep your head down, be professional, and work at it like nothing else matters. I'm still growing, I'm able to do things now that I know I couldn't a year ago. Same for last year and the year before. I don't think any true professional "arrives." They're constantly pushing themselves; they don't sit back and coast.

Indie Craft Parade: Your work seems very popular and well-received. Have you always enjoyed that success? Can you describe some of your experiences before your work was accepted at the level you wanted?

Cory: Well I don't know about that! That's very kind of you to say. With my personal work I can never gauge what will be popular. For example with my prints or with a show, I can never tell which will be the best received or most popular. I just do the work I like. I'm my only guideline, if that makes sense.

One of my biggest hurdles was being declined to a certain annual of illustration. I had already made it into more "prestigious" books, but that didn't matter to me as much as being accepted into this particular book. I applied for the last 4 or 5 years, rejected each time until this past year. You know what? Each time the rejection only made me better. I did my best to keep myself professional, focused, and I just worked even harder for next year. I give this example because I want people to know if they're rejected from something, they should use that frustration to improve. Just take it and work harder. Let it motivate, not frustrate.

Indie Craft Parade: What advice would you give to artists and crafters who are struggling with moving their work to the next level?

Cory: The advice I give to anyone who asks me that is basically the same advice I've been given by friends and mentors; just keep doing it. It takes time, effort, and heart to be a professional--to work at a level that you're proud of. I'm still working towards that level. Just decide what it is you want and fire towards that with abandon.

DIY Round Up: Fun Paper Crafts

ProjectsElizabeth Ramos

I don't know what your plans are for this weekend, but mine will be spent crafting up a storm for a friend's wedding. I'm making a paper and vellum garland, which I'll show you at a later date. But all my work with paper inspired me to share a few paper more paper crafts that I'd love to tackle. Hopefully you'll find some time to craft this weekend...particularly if the crazy hot South Carolina weather continues to keep us all in doors.

Recycling paper bags and other odds and ends into cute, cute wrapping paper; Courtesy of A Creative Mint.

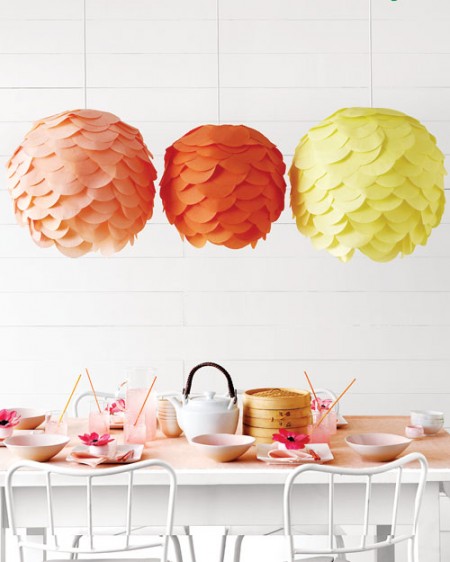
Decorative Paper Lanterns; Courtesy of Martha Stewart.

Dip Dye Paper Cups; Courtesy of Design*Sponge.

Advice for our Vendors: Taking Online Payments

Tips & TricksElizabeth Ramos

Although the world of craft fairs is largely run on cash, there are a few great ways for vendors to accept electronic payments from customers who just can't live without plastic. I want to share one of those with you today: Square App. I've personally used this method at art shows, and I can undoubtably say it's made made my experiences much easier. The Square App is simple, beautiful, and so easy to use. I really don't even need to say much about it. A portable credit card reader fits into the earphone jack of your smart phone or tablet, you swipe the customer's card for the amount of their goods, and you're paid the next day.

All of Square's vital information is located on their website, but that's about all there is to it. Payments are secure. You can even send email or text message receipts to your customers. And the best part about it, it's absolutely free to get started. Square charges a small fee per transaction made, but honestly, it's worth it to have the ability to take cards at your booth. Check it out!

Finding Inspiration: Interview with Annie Koelle

Tips & TricksElizabeth Ramos

We want the Indie Craft Parade Blog to be a helpful resource for everyone in the arts and craft community. So we've decided to include a series of posts that will help both developing and seasoned artists with a variety of topics. We want to discuss things like creating a winning booth, effectively selling goods in person, establishing an online presence and the like. To share this information effectively, we're going to the people who do these things the best. We'll be interviewing (mostly) local artists to get their tips for making your products, branding, or general presence in the art world even better. Today, we're starting with Annie Koelle. She's a painter who presents gorgeous scenes from the natural world. In the 7 years or so I've known Annie, her work has never ceased to amaze me. Everything about her work is inspiring, so I asked her to share some thoughts on the topic of finding inspiration. Sometimes artists burn out or get discouraged when trying to develop new ideas or styles. Annie is continually producing new pieces, and she has graciously shared with us her approach for keeping her work fresh.

To see more pictures of her work, check out this post from 17 Dove Street that features one of Annie's recent shows, hosted in a garden.

P1130718

Indie Craft Parade:

Frequently artists and crafters are at a loss for new inspiration--either new artists don't know how to branch out or seasoned crafters get burned out. You're always working on show material, how do you keep your work new and fresh?

Annie:

I'm always viewing the world as an artist, always on the look out for inspiring things--which is why my work is a reflection of everyday things I appreciate. I'm constantly searching for ideas to run with. I look in decorating magazines, the living breathing growing world, fashion catalogs and magazines (I have several binders of clippings), blogs, artists past and present, poetry, music, and antique stores. And a million other things I'm sure. I also make little composition sketches to remember a painting layout. Usually I will come back to them and decide they are silly. Most of the time I don't use them, but it ends up leading on to other great ideas. I have no regrets ever in recording fleeting ideas. Take an idea and run with it in all possible directions. Don't worry about playing it safe. Always be harvesting ideas!

P1130699
P1130702

PIndie CraftParade: Although you do a wide variety art/craft genres and styles, every piece you do is decidedly "Annie." Can you share any tips for artists trying to show their personality or put consistency in their work?

Annie:

I think that's something that develops over time, so have patience. I had a little bit of a head start, having been given art lessons as a youth, long before college. I can't say that a few years ago I was as consistent, but now I am confident in the mediums I'm working with, so I know how to successfully experiment with them. Also, it may be the subject matter, everything I work into a painting has a very personal connection to my life, past and present. Little things I appreciate such as the birds in my yard, the fig tree I pick from, or perhaps something associated with my childhood.  Here is a good tip: whatever sort of art it is, it must be an absolute overflow of yourself, that you present in a skillful, creative way. It has to be what you truly like, and it has to be good enough that you would hand over money for it --as if someone else had made it. Any sort of handmade thing, it had better be something you'd buy yourself and put in your house, wear out to a party, or hang on your wall. Strive for that! Think about it while you are planning and creating. I think that's the key, I'm finally sure (after years of trying) of what I really like, and I am beginning to figure out how to make art I would actually love to hang on my wall. But not always--can't knock it outta the park all the time. Sometimes its just about getting something out of your brain and into your hands.

Indie Craft Parade:

 Can you suggest any resources for artists looking for new inspiration?

Annie: Like I said, I find resources in a million places, but here are a few of my favorites.

Decorator magazines: I don't really read art magazines. The decor ones actually show you what people hang on their walls.

Pinterest: Follow my art inspiration board.

Poppytalk Blog

Dear Ada: I love the book list she has on the side.

FFFFound Image Bookmarking

Simply Lovely Blog

Where the Lovely Things Are: New Fave!

anniegardenshow

Do It Yourself: Creative Wall Covering

ProjectsElizabeth Ramos

New DIY Project for you. I learned  about this one while at the craft night we hosted a couple of weeks ago. Melinda, one of our participants, recently moved, and she was looking for a creative way to fix an unsightly wall in her bedroom. The previous renter had torn up the some of the wall, and there were bits of peeling paint all over the surface. So Melinda came up with the bright idea of using this tutorial to make tissue paper flowers from vintage sewing patters. Compiling the flowers with other odds and ends from the thrift store, she put together quite a lovely display and managed to cover any ugly splotches in the process. Thanks for sharing the paper flowers and the finished product!

Making the paper flowers at the Etsy Craft Party.

P1130083

The Materials:

Various sizes of tissue paper flowers

Thrifted frames (contents and glass removed), spray painted a pearly off-white--some of the frames she filled with coordinating craft paper which turned out super cute!

Small nails for hanging the frames--1" nails for lightweight, empty frames work fine

Wall safe sticky tack--a tiny bit for holding the edges of the frames level

A level

Thumb tacks

Blogshot1

The wall, tastefully covered.

The Process:

First Melinda laid out all of the frames on the floor to see which arrangement she liked best. It's always a good idea to play with composition before you start nailing things to the wall. After she tacked the frames in place and made sure they were level, she thumbtacked the paper flowers over the nasty wall splotches to hide remaining evidences of peeling paint. The entire project was quite easy, about 4 hours from start to finish. And it looks absolutely great!

Do It Yourself: Herb Gardening

ProjectsElizabeth Ramos

The DIY ethic is the heart of America's craft movement. This ever growing spirit of "I can do that" inspires people to better living where they waste less and frequently spend less. Indie Craft Parade whole heartedly embraces ventures that help people become more independent, so we're going to include a series of posts where we help you make your own accessories and home decor, or enhance your life using tools you already have, or as in today's post, help you grow your own food. Now I'm not talking about becoming independent of the food industry or even digging up your backyard to plant a full vegetable garden. We're starting at the simplest level of food provision--planting an herb garden.

Photos courtesy of this post from the very inspiring photography blog From Me to You.

I love herbs! I have a small container garden just off our back porch, and few things make me happier in the summer than clipping off those fragrant greens to stir into dinner at the last minute. The best thing is, many herbs are ridiculously easy to take care of (even for us with the blackest of thumbs), and making a little container garden is so stinking cheap! For the price of buying fresh herbs at the grocery store, you can make an herb planter that will last you the entire season. Herbs also provide some basic health benefits. They're a great way to add flavor while cutting back on fats and salt.

You probably already have most (if not all) of the materials you need for starting your own herb garden. But here is a basic list:

1) Small containers--at least 6" in diameter so your plants have room to grow (recycled cans with holes poked in the bottom work great if you don't already have cast off flower pots)

2) Fine potting soil

3) Seeds or starter plants--this late in the season, I would definitely recommend starter plants

4) A sunny spot such as a porch, patio, or even a window sill that receives a few hours of good sunlight every day

5) Watering device--herbs don't need a ton of water, but they do like to have it consistently (if you want to get all fancy, you can buy an inexpensive watering systems at your local hardware store)

Now, I'm by no means a knowledgable gardener, but I have had great luck with my herbs. Here is a list of herbs that I have found to grow well in the hot summers of South Carolina: Basil, Rosemary, Oregano (mine comes back year after year now), Thyme, Parsley, Tarragon, and Mint. I have NOT had any luck with Cilantro or Chamomile. I think the heat just does them in too early in the season.

Hopefully you're inspired to go out and try a little gardening of your own. Here are a few parting tips that will make your experience even better.

If you don't mind doing a little research, the Clemson Extension website has this awesome guide on growing and harvesting a variety of herbs.

Worth a Thousand Words: Impressive Product Photography with Very Few Tools (Part 2)

Tips & TricksElizabeth Ramos

In part one of this photo tip series, we discussed the importance of lighting and staging your products. To wrap things up, we're going to go over some simple principles concerning using your camera and editing your photos.

Working with Your Camera

Regardless of the model of camera you have, you can take good quality photos. Key to achieving this is simply getting to know how your camera works. Read the manual and play with the settings. Also, if you have a popular type of camera, there's a good chance you can find an online forum (such as this one) for trouble shooting.

Here are a couple of good principles to follow regardless the type of camera you shoot with:

1) Check your white balance settings. White balance refers to the neutral colors (such as whites or grays) in your photograph. You want to keep those colors true to real life, creating the most pleasing photos. The white balance is affected by the type of external lighting you have. If the white balance is not adjusted, the picture can appear discolored. See example below.

Adjusting the white balance is simple. Go into your camera's white balance settings and adjust the light setting to match the conditions you're shooting in.

2) Use a tripod. I don't care how steady you think you're hands are. Any movement in the camera will result in a lesser quality photo.

3) Keep the ISO on your camera low.  A lower ISO will slow down your shutter speed, but the image will be less grainy. Most digital cameras have an ISO adjustment. If yours does, keep it as low as possible for the kind of light you're shooting in.

Editing Your Photos

Before you upload your product photos right out of the camera, consider these suggestions to put the finishing touches on your photos.

1) Crop your photos. There's usually not a need for a lot of background or white space around your object. Make clear what's being sold, and keep the attention away from what's surrounding your product. Depending on the item you're shooting, it might be a good idea to keep the focus of the picture away from the direct center. Try to crop it on the 2/3 line for a pleasing effect.

2) Sharpen and brighten your images as necessary. If your photo turns out a little darker or less clear than you like, these are good ways to achieve the pleasing effects you want. I know that can sound a little daunting if you have no photo editing experience. So I highly recommend checking out Picnik. It's a free online photo editing program that will do most of the work for you. You can either play with your photos settings yourself or use the auto-fix feature that does a really good job. The program is easy to follow and quite fun when you see the end result.

Just a final word of advice, keep practicing and playing with your product photos. You'll soon find the exact look you want, and the process will become faster and easier as you go.

Weekend Fun: Crafting Party

ProjectsElizabeth Ramos

Thank you every one who came out to our craft party on Friday night. We had such a good time meeting new Greenville crafters and reconnecting with ones we already knew. And the crafts...we had super cute paper wreaths and flowers, fused glass, father's day cards, as well as handmade baby and bridal shower decor to show off at the end of the night. Stay tuned, we'd love to host another party in the future. You'll want to be there when we do.

To see the rest of the pictures from Friday night's fun, check out our Facebook album.

Don't Forget! Craft Party Tomorrow Night!

General Info, ProjectsElizabeth Ramos

Crafty Gathering Found on 100 Layer Cake

Friends of Etsy and Indie Craft Parade are gathering at Dapper Ink tomorrow night for an evening of making crafty goodies. Please join us --even if you don't have a craft to work on. We're bringing some inspirational craft books as well as some card making/collaging supplies to share. RSVP here!

Hope to see you there!

7-10 PM; 207 Wade Hampton Blvd., Greenville, SC 29609; 864-551-3115