Do It Yourself: Herb Gardening

ProjectsElizabeth Ramos

The DIY ethic is the heart of America's craft movement. This ever growing spirit of "I can do that" inspires people to better living where they waste less and frequently spend less. Indie Craft Parade whole heartedly embraces ventures that help people become more independent, so we're going to include a series of posts where we help you make your own accessories and home decor, or enhance your life using tools you already have, or as in today's post, help you grow your own food. Now I'm not talking about becoming independent of the food industry or even digging up your backyard to plant a full vegetable garden. We're starting at the simplest level of food provision--planting an herb garden.

Photos courtesy of this post from the very inspiring photography blog From Me to You.

I love herbs! I have a small container garden just off our back porch, and few things make me happier in the summer than clipping off those fragrant greens to stir into dinner at the last minute. The best thing is, many herbs are ridiculously easy to take care of (even for us with the blackest of thumbs), and making a little container garden is so stinking cheap! For the price of buying fresh herbs at the grocery store, you can make an herb planter that will last you the entire season. Herbs also provide some basic health benefits. They're a great way to add flavor while cutting back on fats and salt.

You probably already have most (if not all) of the materials you need for starting your own herb garden. But here is a basic list:

1) Small containers--at least 6" in diameter so your plants have room to grow (recycled cans with holes poked in the bottom work great if you don't already have cast off flower pots)

2) Fine potting soil

3) Seeds or starter plants--this late in the season, I would definitely recommend starter plants

4) A sunny spot such as a porch, patio, or even a window sill that receives a few hours of good sunlight every day

5) Watering device--herbs don't need a ton of water, but they do like to have it consistently (if you want to get all fancy, you can buy an inexpensive watering systems at your local hardware store)

Now, I'm by no means a knowledgable gardener, but I have had great luck with my herbs. Here is a list of herbs that I have found to grow well in the hot summers of South Carolina: Basil, Rosemary, Oregano (mine comes back year after year now), Thyme, Parsley, Tarragon, and Mint. I have NOT had any luck with Cilantro or Chamomile. I think the heat just does them in too early in the season.

Hopefully you're inspired to go out and try a little gardening of your own. Here are a few parting tips that will make your experience even better.

If you don't mind doing a little research, the Clemson Extension website has this awesome guide on growing and harvesting a variety of herbs.

Meet the Jury: Teresa Roche

Interviews & ToursElizabeth Ramos
jury-terese-roche
art&lightphotos

Teresa Roche's Art and Light gallery is often at the center of attention for Greenville's artist community events. Besides the numerous tasks that come with running a chic art boutique that boasts some of the best finds in town, Teresa manages to produce her own work. She's best known for her whimsical mixed media pieces. Next chance you get, visit her gallery in the Pendleton Arts District. You won't be disappointed.

Indie Craft Parade: You love using found objects as a basis for some of your art. What is one of your favorite finds yet?

Teresa: I love using vintage fabrics and wallpapers in my mix media pieces.  My favorite is a café curtain made from a fabulous 1950's bark cloth. The vivid chartreuse color is my all time favorite color, and it was a total fluke that I found it in a thrift store in New York.

Teresa Folk Tribute 009

Indie Craft Parade: Your gallery is in the heart of the Greenville art district. What kind of growth and development would you like to see in Greenville's art future?

Teresa: I would love to see the Pendleton Street Art's District grow with the addition of a great artsy café and other service businesses that would be open for daily retail hours. That way when customers come to the district they can grab lunch and run other errands within the area. The art, artists, talent and quality is already there. I think that it's so important for small business owners to come together with a concentrated marketing plan and a commitment to spend the marketing dollars and commit to the sweaty equity involved in trail blazing in order to have long term consistent growth.

Indie Craft Parade: As an artist and savvy businesswoman, do you have any suggestions for start-up artists or crafters?

Teresa: Yes, the importance of a business plan.  It doesn't matter how small or how big you start - without a business plan you can find yourself floundering.  Artists and crafters also need to be very thick skinned, willing to put the work out there and to get professional assistance in the areas they have weaknesses (i.e., marketing, accounting, merchandising, sales). It takes all of these things to run a business. And you have to remember that being a successful artist or crafter is a business.

Indie Craft Parade Deadline

General InfoElizabeth Ramos

Please don't forget!!

The application deadline for Indie Craft Parade is tomorrow night at midnight! You're running out of time to show us your fabulous art or crafts. We've made the application process super easy, so please don't delay any longer.

Late applications will not be accepted. Also, unfinished applications will not be accepted, so if you have yet to finish your application or upload your photos, please do so immediately!

Interview with our Jury: Barb Blair

Interviews & ToursElizabeth Ramos
JuryPhotos_barb

Today's jury interview is with Barb Blair, a lady who can do marvels with cast-off furniture. She's made quite a name for herself in both the home design community and the blogisphere, with features in many publications. Her design aesthetic is fabulous, and I'd love to fill my house with all sorts of goodies from her shop. You can visit her studio in the Pendleton Arts District of Greenville or follow her blog, to keep up with all her projects and fun finds.  

Indie Craft Parade: You're contributing to a book coming out! That's super exciting. What can readers expect to see?

Barb: The book is called Design*Sponge at Home, it comes out September 13th. It is basically a large book featuring a lot of the content that makes up the website, and it shows readers how to incorporate the ideas into their homes. There will be lots of people featured in the book, and I will be in the before and after section. My projects will be featured as tutorials on how to transform furniture.

Indie Craft Parade: You exhibited at Indie Craft Parade last year and had such a cute booth. Do you have any advice for this year's vendors for setting up a creative display?

Barb: As far as a creative booth display. I think you should keep your booth consistent with your brand. Incorporate elements that tell your personal brand story without having to say a word. I think another really important thing is to have plenty of product. A full booth sells, and giving people lots of options is key to attracting a variety of buyers.

Indie Craft Parade: What is a quick summary of your creative process for restoring furniture? Do you have usually have a vision for a piece as soon as you see it?

Barb: When I pick up a piece of furniture I am always looking for interesting details that will stand out when painted. Or I look for furniture that I can add interesting detail to, such as wallpaper, stripes, and/or shiny new hardware. I check to make sure the piece is structurally sound and that all repairs (if necessary) are within my means to repair or can be repaired by a professional without taking too much off my bottom line. Once all of the repairs are made and the piece has been sanded and prepped for paint, I get to work executing my design plan. Speaking of design plans, I usually know right away what I will do to a piece when I see it, but there is the occasional piece that sits and stares at me in the studio for a few months before the plan hits me.

DSC_0701

Indie Craft Parade: What new and exciting things can we expect to see from your studio in the near future?

Barb: One other cool thing is that I have just designed and had built my first piece of furniture! It will be the start to my new Knack couture line which will consist mainly of wallpapered and highly design intensive pieces. Other than that I am painting away in the studio, shipping pieces all over the country. And I just recently shipped my first international piece to TOKYO!

2010 Overview

General InfoElizabeth Ramos

In case you're looking for a quick overview of last year's event, this will help! Using Daytum, a beautiful data collection tool, we created a few (only somewhat nerdy) graphs to help us visualize several statistics from last year.

ICP_wordspread
ICP_categories

At a glance, you can see how people heard about our 2010 event, and the number of applications we received in each category. My personal favorite graph shows how much experience our vendors had before participating in Indie Craft Parade. You can visit our Daytum page here to see that one and more!

Worth a Thousand Words: Impressive Product Photography with Very Few Tools (Part 2)

Tips & TricksElizabeth Ramos

In part one of this photo tip series, we discussed the importance of lighting and staging your products. To wrap things up, we're going to go over some simple principles concerning using your camera and editing your photos.

Working with Your Camera

Regardless of the model of camera you have, you can take good quality photos. Key to achieving this is simply getting to know how your camera works. Read the manual and play with the settings. Also, if you have a popular type of camera, there's a good chance you can find an online forum (such as this one) for trouble shooting.

Here are a couple of good principles to follow regardless the type of camera you shoot with:

1) Check your white balance settings. White balance refers to the neutral colors (such as whites or grays) in your photograph. You want to keep those colors true to real life, creating the most pleasing photos. The white balance is affected by the type of external lighting you have. If the white balance is not adjusted, the picture can appear discolored. See example below.

Adjusting the white balance is simple. Go into your camera's white balance settings and adjust the light setting to match the conditions you're shooting in.

2) Use a tripod. I don't care how steady you think you're hands are. Any movement in the camera will result in a lesser quality photo.

3) Keep the ISO on your camera low.  A lower ISO will slow down your shutter speed, but the image will be less grainy. Most digital cameras have an ISO adjustment. If yours does, keep it as low as possible for the kind of light you're shooting in.

Editing Your Photos

Before you upload your product photos right out of the camera, consider these suggestions to put the finishing touches on your photos.

1) Crop your photos. There's usually not a need for a lot of background or white space around your object. Make clear what's being sold, and keep the attention away from what's surrounding your product. Depending on the item you're shooting, it might be a good idea to keep the focus of the picture away from the direct center. Try to crop it on the 2/3 line for a pleasing effect.

2) Sharpen and brighten your images as necessary. If your photo turns out a little darker or less clear than you like, these are good ways to achieve the pleasing effects you want. I know that can sound a little daunting if you have no photo editing experience. So I highly recommend checking out Picnik. It's a free online photo editing program that will do most of the work for you. You can either play with your photos settings yourself or use the auto-fix feature that does a really good job. The program is easy to follow and quite fun when you see the end result.

Just a final word of advice, keep practicing and playing with your product photos. You'll soon find the exact look you want, and the process will become faster and easier as you go.

Weekend Fun: Crafting Party

ProjectsElizabeth Ramos

Thank you every one who came out to our craft party on Friday night. We had such a good time meeting new Greenville crafters and reconnecting with ones we already knew. And the crafts...we had super cute paper wreaths and flowers, fused glass, father's day cards, as well as handmade baby and bridal shower decor to show off at the end of the night. Stay tuned, we'd love to host another party in the future. You'll want to be there when we do.

To see the rest of the pictures from Friday night's fun, check out our Facebook album.

Don't Forget! Craft Party Tomorrow Night!

General Info, ProjectsElizabeth Ramos

Crafty Gathering Found on 100 Layer Cake

Friends of Etsy and Indie Craft Parade are gathering at Dapper Ink tomorrow night for an evening of making crafty goodies. Please join us --even if you don't have a craft to work on. We're bringing some inspirational craft books as well as some card making/collaging supplies to share. RSVP here!

Hope to see you there!

7-10 PM; 207 Wade Hampton Blvd., Greenville, SC 29609; 864-551-3115

Join us for the Etsy Global Craft Party!!

General InfoElizabeth Ramos

Indie Craft Parade is co-hosting the Greenville branch of Etsy's second global craft party. This Friday, June 10, people all over the world will gather for a evening of spontaneous creating. If you live in the Greenville area, please join us for the party. We'll be meeting from 7:00 to 10:00 at Dapper Ink, located at 207 Wade Hampton Blvd, Greenville, SC 29609. Bring a your own craft to work on and a snack or drink to share. Please RSVP at the Indie Craft Parade Facebook Page.

Check out the stats from last year. This is from the etsy blog:

It's time to celebrate! Last year's first-ever global Craft Party was so much fun, we've decided to orchestrate it again this year on Friday, June 10, 2011. No matter where you live or what you love to make, you are invited to participate. Musicians, painters, sculptors, photographers, farmers, hackers, gardeners, designers, jewelers, bookbinders, printmakers, teachers, makers and doers of all stripes, as well as art enthusiasts, curators, vintage lovers and supporters of the independently made, we're calling on you! We challenge you to meet your neighbors and come together to make something surprising.

Last year, over 5,000 people participated in over 500 meetups from Dallas to Romania, and this year our goal is for over 15,000 people to share in the spirit of Craft Party.

Worth a Thousand Words: Impressive Product Photography with Very Few Tools (Part 1)

Behind The ScenesElizabeth Ramos

When selling or displaying work online, whether in a venue like etsy.com or even for our jury via the online application, you really only have one way to impress your audience--great product photography. Unfortunately, no matter the quality of your crafts, they won't catch people's attention unless you capture them just right through a lens. So to give you an inside tip on how to impress the jury...and everyone else with your work, I've put together a two part post on how to gain the upper hand through good product photography. Today we'll discuss the elements of lighting and staging, and next time we'll talk about using your camera to the fullest as well as give a few editing tips.

Lighting Techniques

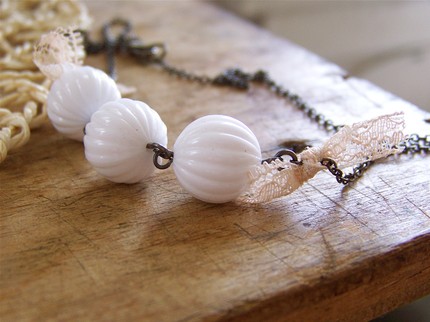
First (and perhaps most important), let's go over a few techniques for lighting your work properly. Here are two basic rules to follow: 1) Never use harsh, direct lighting. 2) Never use an unfiltered flash. Look at the examples below. You can see the example necklace shot in three different light settings--harsh direct light, low light with a flash, and set up in a light box.

Example Front Lighting

You can easily see which quality of picture is best--and therefore which picture is most likely to sell the product. The harsh, direct lighting creates garish shadows around the necklace that really distract from it and using a flash mutes all of the details in the necklace, creating a generally muddled and discolored photo.

For best results with controlled lighting, you should shoot your products in a light box--a translucent cube that evenly disperses light around the object. Light boxes transform narrow beams of light into broad, big light which softens shadows and gives a pleasant, even tone to the photograph.

Now I realize that most of us aren't that serious enough photographers to go out and buy a light kit. So through a great tutorial (and using products I already had at home), I made this DIY light box in about 20 minutes and for absolutely free. Once I made the light box, I used two desk lamps to light the necklace shot above. The whole process was quite simple. I spent the most time just fiddling with lamps to find the best lighting angles. I found that jewelry is usually best lit from the top. You might also have to adjust the diffuser panels (in my case, waxed paper) according to what you're shooting. For the ceramic mug I photographed (below) I taped an additional piece of paper directly above the mug, inside the actual light box, to create the lighting I wanted.

If you don’t want to go through the trouble of making a light box, here are a few other tips to create the desired look:

1) Shoot in soft, natural light. If the morning light through your window is too strong, wait until the afternoon to shoot. If the sunlight coming through your window is too direct, you can help diffuse it by hanging a sheer panel.

2) Just like when using a light box, you'll have to play with the relation of the sunlight to your product. Changing your position will affect the shadows and color of your photo, so take pictures from multiple angles to see which you like best.

3) If you have an object too big to fit in a light box or on a tabletop, you'll probably need to shoot it outside in closed shade, like on a porch.

Staging Products

Second, let's talk about staging or how you position your items to be photographed. Now, you don't have to create an elaborate stage for your items. Many product photographers prefer not to. There are pros and cons to both. For example, look at the pictures below. Which would you prefer to buy?

One the table top, the necklace looks like it might be right at home on your dresser. However, in the light box, you can get a better look at the whole product.

If you choose to stage your crafts for photography, here a few guidelines and ideas:

1) Choose a simple background--especially if your products are small. I like how this photographer foiled her jewelry with the brightly colored card stock. I think it really makes the silver pop.

2) If you are going to include other objects in the photo besides your craft, make sure they enhance the overall feel of the photo and never detract from what you're actually trying to show off. For example, I shot the ceramic mug below with items that naturally associate with coffee--whole beans, a napkin, cinnamon, etc. But I made sure that the focus of the picture remained on the mug.

3) Position your products creatively or to show off their best angles.

4) If you want ideas for staging your specific craft, check out this website. It gives a lot of good tips for different craft items.

Here are some parting examples of staged products that I really like. For further reading, check out some of the links below in my shout-out section. Happy photographing!

Shout-out to more wonderful sources that made this article possible:

My friend and local photographer, Philip Eoute.

Design*Sponge Biz Ladies

Indie Made

Oh My! Handmade Goodness

A Fine Tooth Comb

Interview with our Jury: Kevin Isgett

Interviews & ToursElizabeth Ramos

Indie Craft Parade has the enormous privilege of having a fabulous jury to overview the entries for this year's event. I've been to their shows, visited their studios, and let me tell you, their art has yet to disappoint. To give our readers a little better glimpse into their work, we're posting a brief interview with each of them. We're starting our interviews with Kevin Isgett, a talented artist of many mediums. I did not have the privilege of having him as an art teacher, but any of his students I've know have loved his classes.

Kevin Isgett_bw

Indie Craft Parade: Where are you currently finding some of your inspiration for your art and craft?

Kevin: I find inspiration for my work everywhere. Contemporary jewelry design is one of my major interests. Visually I'm inspired by natural forms... microscopic life, fungus, common detritus and trash. I like the juxtaposition of the castaway object with the precious. Almost anything can be beautiful if presented thoughtfully. I also collect vintage photos. Sometimes on a trip I leave the interstate to take pictures of the backsides of old billboard structures. I love their patina and structure.

Indie Craft Parade:

On the Jury page of the ICP website, you say that you like the "creative weirdness" of contemporary art. Have you worked with a material in one of your pieces that you think is particularly weird?

Kevin:

Yes, I do enjoy the creative weirdness of contemporary art and craft. The art world has become much more accepting of a huge range of working styles and subject matter over the last few decades. I love the ability it gives the artist to work in almost any style or medium. Many artists are capitalizing on the quirky unexpected qualities of found-objects and non-traditional materials creating a kind of visual poetry. Since I have a high threshold for what constitutes weirdness, I'd have to say I have not gotten there in my own work.

Kevin Isgett 1

Indie Craft Parade:

Aside from art, what other hobbies do you have?

Kevin:

Other hobbies?... I enjoy going to junk stores and flea markets, looking for things to use in my art. I must be a one-trick-pony because most of my hobbies center around my art interests. Reading good fiction and poetry is a wonderful escape.

Advertise with Us!

General InfoElizabeth Ramos

One of Indie Craft Parade's goals is to serve our greater community. We want to help you tell the world about your business, and we can do that by offering advertising space on our blog. Since its beginning last year, the Indie Craft Parade website has had over 20,000 visitors, and we expect that number to sharply increase during our second year. We're offering competitive pricing and great exposure for your company--so click on the image below to get more information and see how advantageous this opportunity can be!  

icp_blog_advertising

icp_blog_advertising

Now Accepting Applications!

General InfoElizabeth Ramos

We are now accepting applications for this year's Indie Craft Parade! All regional artists and crafters are encouraged to submit their work for consideration. Applications must be submitted before midnight EST on June 19, 2011. Our application process is completely online this year, and is much more streamlined and user-friendly.  A huge thank you to Duo Interactive, a local web design team that donated this wonderful feature. Click here to apply!

Join us for a special film screening!

General InfoElizabeth Ramos

UPDATE:Thanks so much to everyone who came out to the Handmade Nation screening! We thoroughly enjoyed the discussion after the film, and it was wonderful to meet some new friends.

...................................................................................................................................................

Hopefully by now you've seen the posters around town or heard the news on our Facebook page, but in case you missed the announcement, we are very excited to be hosting a special screening of the independent documentary, Handmade Nation! The showing is TONIGHT, so please reserve your tickets now! After the film, there will be a short discussion and we'll share what's new this year for Indie Craft Parade.

Handmade Nationdocuments the new wave of art, craft and design that is capturing the attention of the nation. It is the feature film debut of director, author, artist and curator Faythe Levine. Levine traveled to 15 cities and covered more than 19,000 miles to interview artists, crafters, makers, curators and community members.

Director Faythe Levine captured the tightly knit community that exists through websites, blogs, and online stores that connect to the greater public through independent boutiques, galleries and craft fairs. Interviews were conducted on-location in artist studios, homes, boutiques, offices and craft fairs, giving the public an exclusive and rarely seen look into the lives of these creative individuals. This screening is hosted by Indie Craft Parade in collaboration with Greenville Forward and The Warehouse Theater. Join us on Tuesday, May 31 at 6:30 pm; admission is $10 and space is limited! Reserve your tickets online here, or by calling 864-233-8443.

Our vision for Greenville

General InfoElizabeth Ramos

Last year people kept telling us how happy they were an event like this had come to Greenville, SC. And we were a little puzzled when many of them asked us when Indie Craft Parade would be back in Greenville--as if it had originated somewhere else. Now, their questions were certainly valid. Frequently craft fairs will move from location to location on a rotating basis, and if you're lucky enough to be close by, you can attend. But we want to make it very clear that Indie Craft Parade is different. We created and maintain this event as something unique to our city. We love Greenville and want to encourage growth in the local and regional art scene from right here in our hometown. Although we love the fact that we're contributing to the national movement of emerging artists, independent crafters, and small business owners, we've decided to put our best efforts here at home. And we hope to make a lasting impression in our special city.

What we've been up to

General InfoElizabeth Ramos

Even before we packed up our goods from the first Indie Craft Parade last September, we began planning the second event. A party this big takes a lot of prep and coordination, and we've been working on a few tricks to make this year's event even better than the first.Let me share a little of what we've been scheming:

1) We've applied to become an official 501(c)3 non-profit organization. This not only opens us to a broader range of sponsorships, but also (and more importantly) it will help us give back to our own arts community. As Indie Craft Parade grows, we want to use our proceeds to benefit the art programs of local schools. We want kids to continue the rich tradition of arts and crafts that has flourished over the past few years, and Indie Craft Parade can really help encourage that end. If you want to assist us giving back, please review our sponsorship opportunities.

2) We've expanded our organizational team into an official board of directors and assembled a new jury for this year's event. We called on the help of long standing friends, art professionals, and members of Greenville's art community to assist with the planning and selection process for the Second Annual Indie Craft Parade. These individuals have all influenced Greenville's art scene and have graciously partnered with us to find the Southeast's best artists for our event. Don't worry...we'll introduce them and their fabulous work in later posts.

3) We keep crafting. In the months since Indie Craft Parade, we have yet to put our tools down. We don't just organize this event, we actually participate in and attend similar festivals around the Southeast. We've had so much fun connecting with vendors at regional fairs such as The Big Crafty,Indie Craft Experience, and Crafty Feast, and we hope to see lots of the friends we've made take part in our event as well.

Thanks for joining us!

General InfoElizabeth Ramos

Welcome to the official blog of Indie Craft Parade! It's hard to believe that in a few short months our second annual event will be in full swing. We're in the midst of all the planning, and have created a blog for sharing all the wonderful details along the way.

We'll introduce you to the amazing people such as our jury, organizers, and sponsors who make this event possible. You'll also have a chance to preview a lot of the work that will be on display at Indie Craft Parade through our artist spotlights. (You'll have a shopping list ready by September for sure!) Plus, we're developing a whole section of tips and tidbits for emerging crafters. We'lll share secrets of the trade from veteran crafters and small business owners and discuss topics like creating a successful booth display and how to better sell your work. Also, expect some fun posts about crafting trends, upcoming events, and a few DIY projects for when you need a little inspiration.

Thanks for coming along for the ride!