We're happy to be starting off 2013 on an exciting note. We're less than a month away from The Makers Summit! We can't even say how excited we are to meet everyone and listen to our various experts. Stay tuned over the next few days! We're especially excited to give some sneak peaks about The Best Craft Party Ever. It's going to be epic!
Merry Christmas from Indie Craft Parade! See you in 2013!
General InfoWe've had such an amazing year with Indie Craft Parade. We met amazing new artists at the September festival, topped our goal of attendees, added a Holiday Fair, and are in the midst of planning a new small business conference. We'll be taking off the next week or so to get some much needed rest and time to start scheming for everything to come in 2013!
We'll be back bright and early in the New Year full of new details about The Makers Summit.
See you then!
Presenting The Makers Summit sponsors: MailChimp
Behind The Scenes, General InfoThe closer we get to the The Makers Summit, the more we want to tell you about the people who make the meet-up possible. We have worked with and used the services of MailChimp since the beginning of Indie Craft Parade, and they have proved time and again to be an indispensable resource.
MailChimp describes themselves as a way to help you: design email newletters, share them on social networks, integrate with services you already use, and track your results. In short, they call themselves “your own personal publishing platform.” Besides keeping you and your followers organized, MailChimp provides beautiful design templates, loads of free advice and tutorials, and even ways to manage all of your features on the go. Best of all, you can get most of the MailChimp services for FREE! Their no-nonsence approach to mass communication combined with their fun personality and great design make MailChimp a great tool for anybody.
For The Makers Summit, not only has MailChimp shared their monetary support, but also they're sharing their staff. We are so, so excited to have Amy Ellis, the Head of Integrations and Partnerships at MailChimp, as one of our panelists. She is truly a girl after our own hearts. Besides helping people do awesome things with their businesses everyday, Amy is a regular speaker for crafty conferences, a foster parent for her neighborhood dogs, and an ardent fan of yarn bombing (so fun!).
For The Makers Summit, Amy will be sharing her wealth of knowledge about email marketing. She understands how overwhelming it can be to step away from the hands-on projects to promote yourself, so we can't wait to hear loads of tips and practical advice from her at the conference. For a sneak peek of her genius, check out this interview as part of Unbounce's Conversation Heroes.
Thank you again, MailChimp. We love working with you and so greatly appreciate everything you do for the making community.
The gift of the Makers Summit, A perfect Christmas present
General InfoChristmas is right around the corner, and we've got an awesome idea to help you finish off your shopping list. Why not give the gift of the Makers Summit? We're gearing up to create the best one day conference in the Southeast, and this is an amazing gift for creatives and small businesses alike. Help jumpstart or further the career of an artist, crafter, or creator by giving them the opportunity to connect with fellow creatives while learning how to start or grow his or her creative business.
But guess what!The Makers Summit isn't just for full or part time makers. We're ending the conference with an after party that's open to anyone who loves great food, crafting, and hanging out with other creative types. This will be the perfect evening for friends, couples, or anyone who just wants to learn more about the creative world.
So we have 3 gifting options:
An all-access pass for both the conference and after party for $150. The conference day pass for $100. The Greatest Craft Party Ever evening pass for $50.
So surprise someone special with this amazing gift. With your ticket purchase, we will send your recipient a specially printed invitation to the Makers Summit with all of the details for their registration.
Purchase tickets now.
Quick Christmas DIY Framing
ProjectsI picked up this screen printed poster from Dapper Ink earlier this week for a steal ($12 for an 11 x 17" print!), but I needed some real inspiration for how to mount and hang it in my living room. I didn't want to do a traditional frame from the hobby store--I have such a hard time finding one that I like, and anything custom costs an arm and a leg. Not to mention, since this is a seasonal print and will be packed away in less than a month, I wanted to showcase it in an unconventional way. So I went on a hunt through the house, and came up with a framing technique all my own. Although I think this mounted poster turned out really great, this method could work for any holiday paraphernalia you pick up this season (photos, greeting cards, etc.)
What you need:
Poster or holiday print 1/4" thick plywood (or foam core board if you're in a pinch) Washi tape Blade or scisors Double sided foam tape Small eye screw (optional) Nail or frame mounting hardware (optional)
How to do it:
1) Start by measuring your poster, photo, or print. You'll be mounting this onto the plywood. Then measure and cut your plywood. Obviously you want your plywood to be larger than the poster, but if you're wondering how much larger, a good rule of thumb is as follows: Make the plywood 3" larger than the print on the top, right, and left and 3 1/2" larger on the bottom. Now, I'm lucky enough to have a husband with a table saw, so this wasn't an issue. However, if you don't have a friend or family member with a table or skill saw, this is where the foam core comes in handy. Simply cut it to size with a straight edge and blade.
2) Find a festive print or color of washi tape. Have I ever mentioned how much I love washi tape?? I truly use it for everything...packaging, labeling, and now apparently framing too.
3) Line up the washi tape with the horizontal and vertical edges of the plywood. Carefully roll it to the opposite end (it's fragile) and firmly press to smooth. I liked this method because it kept me from sanding and filling any of the rough edges of the plywood. Trim your edges once you've gone all the way around the plywood and are satisfied with the placement.
4) Adhere the double sided foam tape to the four corners of the back of the print and line up on top the plywood. Press firmly. I like the floating look of the foam tape.
5) To mount on the wall, I screwed in a single eye screw into the center of the back of plywood about 2" from the top. Then I hung it from an existing nail on the wall. But this piece has a large enough presence, I could just lean it against the wall on a table or mantle.
So that's that! Super simple and a really festive way to hang a holiday print.
Holiday Event you don't want to miss: December First Fridays, Kid Art show, and Joey Bradley Heirloom and ornament show
Craft News, FestivalsIf you're weren't able to attend our Holiday Fair (or even if you did), here are a couple of great art events that are taking place this weekend. Tomorrow is the first Friday of the month, which means it's another great night for an art crawl. Studios up and down the streets of West Greenville will be open to the public, and two of our food favorites---Neue Southern and Asada---will be there to make it a party! In conjunction with the December First Fridays is a fabulous show (AND GIVEAWAY) by one of our long time artist friends--Joey Bradley. Joey has exhibited at Indie Craft Parade for the past two years, and we're continually amazed with the beauty of his work. At this event he'll be doing two giveaways, so be sure to check out the details on his Facebook page and attend the event for a chance to win some amazing fine art.
And to finish things off for tomorrow evening on Pendleton Street, you have to check out a show that will steal your heart. It's the annual Kid Art Show, featuring 5 young artists. The show will be hosted at the photography studio of Jeff Hall, Aaron Green, and Christine LeGrand. Here is a video from last year's show!
http://vimeo.com/14185061
Edit: Another great event we almost forgot to mention is the Art Bomb Luminary Christmas Show! The Art Bomb is a shared artist studio located just down the road from Joey Bradley and the Kid Art Show, at 1320 Pendleton Street. To find it, just follow the luminaries lining Pendleton Street. You can't miss it!
Tote Bag Giveaway
General InfoThank you so much to everyone who came out this weekend to support the Holiday Fair! We had a great crowd with over 1,300 people attending. And it was also great to make new friends in the arts district. There's some amazing talent over there. If you'd like to see more pictures of the Fair, check out our Facebook album.
Well, it's Christmastime, and we're feeling really festive today. Not to mention...We just hit 2,000 fans on Facebook, so as a thank you to all our fans, we're doing a little giveaway.
What's up for grabs: 2 of our Buy Handmade tote bags. These totes were screenprinted right here in town by Dapper Ink on fabulous Baggu bags. These totes are super sturdy and durable, and fold up into a tidy little pouch for carrying wherever you go.
How to enter: Comment on this post! Tell us what you're buying or making handmade for the holidays.
Deadline: The 2 winners will be drawn randomly and announced on Friday, Dec. 7. We'll ship the prize anywhere in the continental US.
Holiday Fair Gift Guides Part 2
Artist Showcase, General InfoWe're back with more handmade suggestions for all of those people on your Christmas list.
FOR THE COLLECTOR:
For those who are always looking to add to their gallery wall.
Benediction print by Chris Koelle
Operatic Dragon print by Cory Godbey
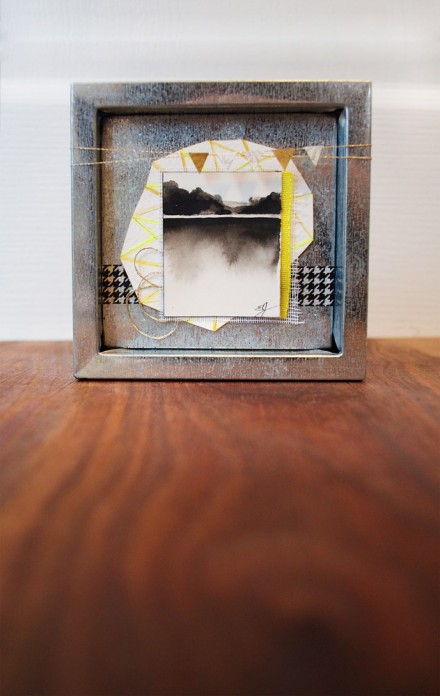
Collage art by Emily Jeffords
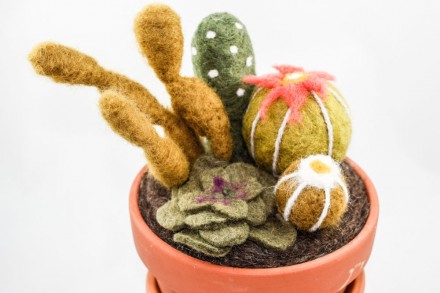
Felt cactus garden from Once Again Sam
GREAT STOCKING STUFFERS:
Need just a little something for a party, gift exchange, or stocking? These artists will have items under $10.00 at their booths.
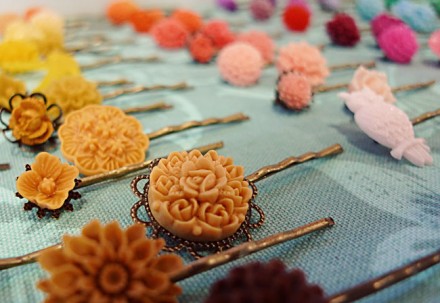
Assorted Bobbies from 17 Dove Street
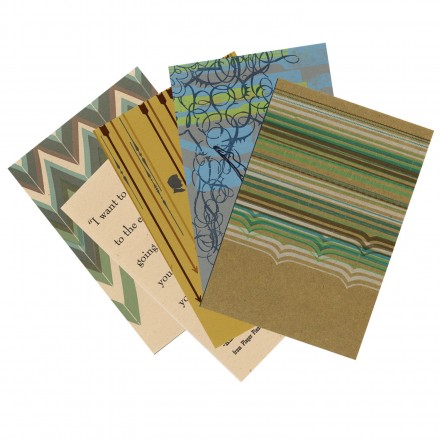
Letterpress greeting cards from Quill and Arrow Press
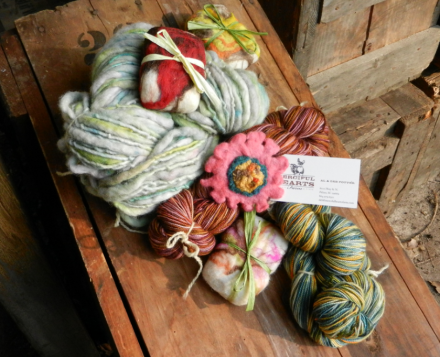
Hand spun yarn skeins from Merciful Hearts
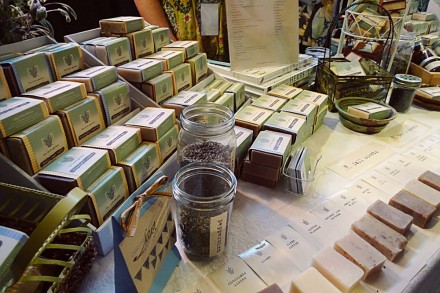
Locally made soaps and scrubs from The Herb Garden
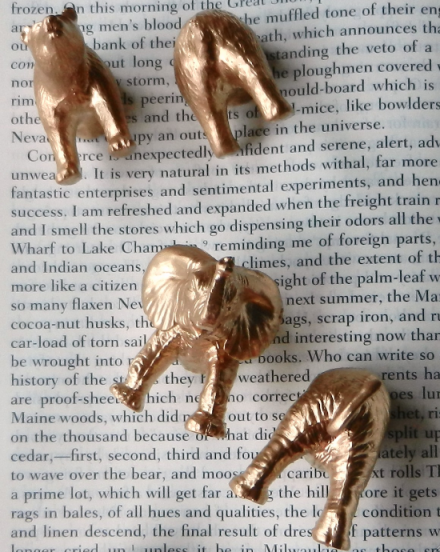
Animal magnets from Juxtaposition
Two more days! See you Saturday!
All that Glitters: a special tree for the Holiday Fair!
General Info, ProjectsWell, do we ever have a surprise for everyone who plans to attend the Holiday Fair! Last night the Indie Craft Parade staff had quite the crafty get together where we made over 60 handmade ornaments. (I'm not sure the glitter will ever come out of the carpet.) And guess what?! They're all going on an adorable 4 foot tree provided by our friends at We Took to the Woods. And we're going to raffle off the entire tree this Saturday at the Holiday Fair!! Check out this sneak peek at our work.
Pretty cool, huh? We'll have raffle tickets available at the event. And next week we'll even give you DIY instructions for a couple of the ornaments we made, so you can give it a try.
So if you didn't already have enough reason to attend, you can check out our beautiful tree and purchase raffle tickets to win it.
See you Saturday!
Holiday Fair Gift Guides Part 1
Artist Showcase, General InfoWe're just days away from the Holiday Fair, and we can hardly hold in our excitement! We've made our shopping lists, and I want to share these ideas with you. Here are some ideas for all those special people in your life.
FOR HIM:
Know a creative guy or someone who just appreciates the cool things in life? Be sure to visit these vendors at the Holiday Fair to pick up a gift that will leave you looking awesome!
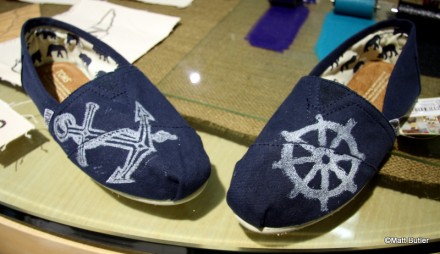
For the socially conscious guy with good taste: handprinted Toms shoes by Matt Butler.
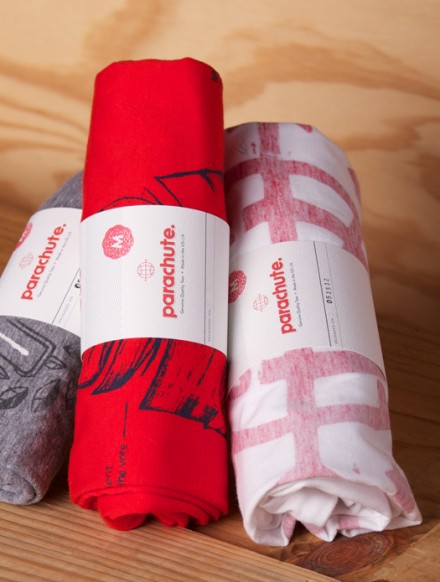
For the guy who loves jeans: Locally printed and designed tees by Parachute Clothing.
For the Perfect Gentleman: hand sewn ties from The Cordial Churchman.
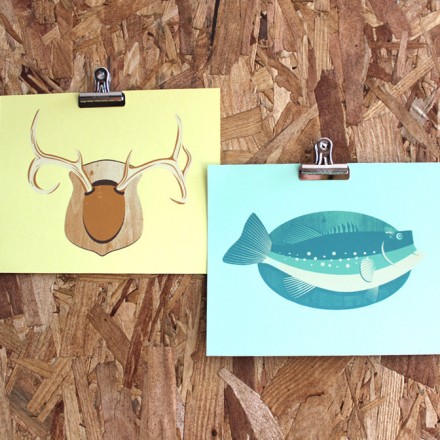
For the Man Cave: prints from Shed Labs.
For the Cycle-phile: prints by Matt Butler.
For Her:
All girls love jewelry, but not just any jewelry...something that sets them apart from the rest. We'll have quite the selection at the Holiday Fair. Plus other awesome fineries for the chicas you know.
For the bibliophile: Leather wrap bracelet from the found'ling.
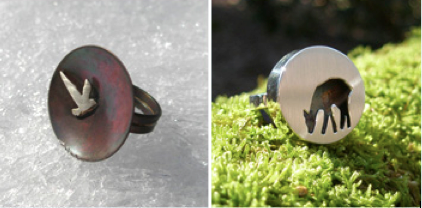
For the nature girl: animal rings from Audrey Laine.
For the Explorer/Adventurer: felt fungi necklaces from Heather Keew.
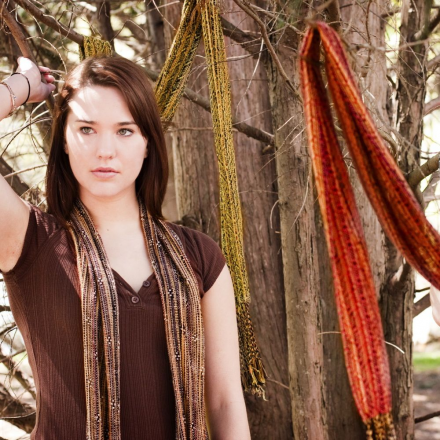
For the Accessorizer: hand woven scarves from Teri Goddard.
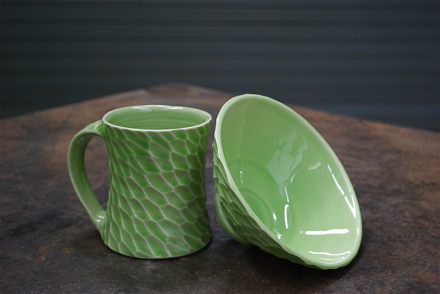
For the Coffee/Tea Connoisseur: hand thrown and carved mugs from Rachel Feece.
Who's on your list? I guarantee we'll have something for everyone! Stay tuned for more guides.
String Art Demo from Dapper Ink
Artist Showcase, ProjectsA few months ago, we shared our love of string art---that is incorporating string into an existing piece, or creating art entirely out of string. So we were pretty excited when our friends at Dapper Ink (a local screen print and design shop here in Greenville) decided to do a new installation that featured string art. Over the past years, Dapper Ink has hosted installations created by local artists. With the addition of letterpress printing to their shop, however, they wanted to do something that showed off their love for all things print, and the Long Live Print plans began. So check out their behind the scenes video. They've proved that string art (though time consuming) can be an accessible form of art. Maybe this will even inspire you to try it yourself.
http://vimeo.com/53853809
If you're interested in making some string art of your own, Jen from Dapper Ink has shared a few tips:
1) Rather than just going at the project with nails and string, have a plan. We actually printed our design on a banner printer, attached it to the plywood and used that to guide our nail holes. The paper is also great because it keeps your wood underneath clean. Our hands got REALLY messy because of the oxidation on the nails. Chances are you might not have access to a banner printer. No problem...as long as you're not doing a huge installation, print outs from home should work fine.
2) Recruit friends to help you put in the nails. It WILL take you longer than you think.
3) Look at string art inspiration online to give you an idea of how you want to wrap your string, that is, how you want the pattern to look. Do you want it to be very uniform? Or is it ok to be messy and random? Either choice can be fine, but it's difficult to change your tactics once you've started to fill in the nails with string.
4) Use one continuous strand of string or yarn for as long as you can to maintain an even look to the design. However, tie off the ends often. If it starts to unravel, you could lose all of your work to your last tie off point.
Upcycling Vintage Crates and Boxes from Maiedae
Artist Showcase, ProjectsWe've had such an incredible response to Emily's DIY Chalkboard Lettering a couple of weeks ago, I couldn't wait to put up a new guest blog post from another talented lady. Today I'm introducing Savannah Wallace from Maiedae--an artistic, fashion, and lifestyle blogger. Two years ago Savannah and her business partner Jenny participated in Indie Craft Parade as jewelry artists, and I've been mesmerized with their work ever since. Besides her work in jewelry, Savannah is also a graphic designer and photographer. I've been pestering Savannah to do a guest blog post, and fortunately, her busy schedule has allowed her to share this adorable tutorial with us. Thank you, Savannah!
** ** ** ** ** ** ** ** ** ** ** ** ** ** ** ** ** ** ** ** ** ** ** ** ** ** ** ** ** ** ** ** ** ** ** ** ** ** **
DIY: UPCYCLING VINTAGE CRATES & BOXES
Hello friends! Savannah from
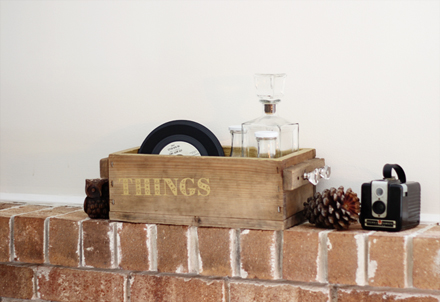
here to share with you a simple DIY and tips on up-cycling your vintage crates and boxes. Last year I spent some treasure hunting time at local antique stores in search for wooden finds. I found old coca-cola crates, small wooden boxes and a few larger crates. I built up my little collection and have found over the past year that they've served for many uses! I used them as display pieces for my handmades at a craft show, stacked them together to make night stands for my husband's and my pallet bed, put plants on them outside and used them for pretty storage. Today's DIY shows how I used simple elements to up-cycle one of my favorite wooden boxes as a "free for all" things box.
SUPPLIES
* Multi-surface paint - I used Martha Stewart's metallic gold paint.
* Stencil or silk screen - I found a great selection of stencil pieces and some beautiful Martha Stewart silk screen letters at Michael's. You can find things like this at your local craft shop.
* Dresser knobs.
STEP BY STEP
1. Using a drill, make holes into your wooden piece for knobs or hooks. Use these to hang your keys, add a little visual interest or hang other treasured items from.
2. Paint the inside of your crate with a color of your choice to give your box/crate dimension and a little pop or color or metallic flair.
3. Stencil a word or pattern on your box to match its use.
Just by getting a little creative you can easily up-cycle any of your favorite wooden antiqued pieces and give it a little extra charm! Try using your favorite colors, fun stencil patterns and trying it out in different places in your home. I love that my "things" box can be used for mail, main floor nick-nacks, make-up and bathroom supplies. So many uses and way more attractive than a plastic bin.
Thanks for having me! Stay warm.
-Savannah
Holiday Fair Etsy Treasury
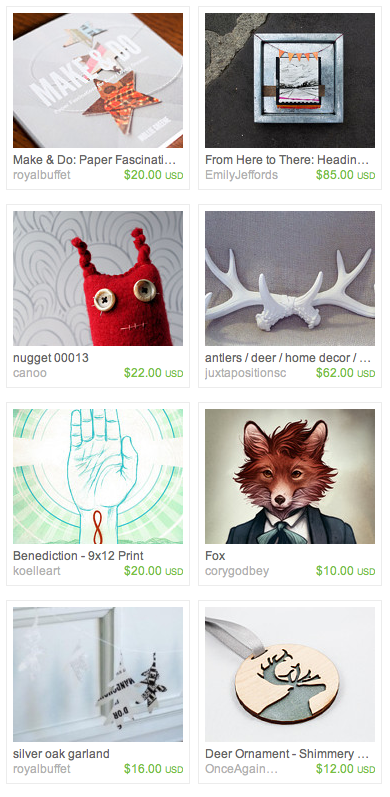
Artist Showcase, General InfoWant a sneak peek into some of the goodies available for the Holiday Fair? Check out this Etsy treasury we made, and learn to make your own! But don't stray far. Over the next two weeks we'll have more holiday goodies to share including gift guides and details about other local partners we've picked up.
2012 Scholarship Winner!
Craft NewsThank you to all of the teachers who applied for the 2012 Indie Craft Parade Scholarship Program. We received some really great applications from schools around the Greenville area. And as always, we wish we could help every single one of them. But we're happy to announce that this year's winner of the scholarship is Gateway Elementary School in Traveler's Rest. Joanne, the school's art teacher, shared with us that her classes are the only creative outlet for many of her students, who don't typically have access to art supplies at home. Also because of severe budgeting, her own program is lacking in many resources. We're so happy that we were able to more than double her yearly budget with our scholarship.
We can't wait to see what great things her students will produce. And we're looking forward to sharing that with you in the near future!
Indie Craft Parade Holiday Fair: The official details
Craft News, FestivalsWhat: Indie Craft Parade Holiday Fair When: Saturday December 1, 10 am – 5 pm Where: A smaller, more intimate venue in the Pendleton Street Arts District Artisan Traders, 1274 Pendleton Street, Greenville, SC 29611
We're less than a month away from our first annual Christmas event, and we're getting ready to celebrate a handmade holiday! Please share the word with friends, family, and anyone else you know who would love Indie Craft Parade.
New Venue! For our smaller, one day event, please note the change in venue from the Huguenot Mill. Here's a map to the new location.
We're so excited about all of the artists who are on board for the show. Here they are!
2D
Emily Jeffords Cory Godbey Shed Labs Chris Koelle
3D
Fiber Arts
Heather Keew Merciful Hearts Farm Once Again Sam Teri Goddard Handweaving Heartfelt
To Wear
17 Dove Street found*ling Hand Printed by Matt Butler Fox to the Opera Parachute The Cordial Churchman Audrey Laine Jewelry
Paper Goods
Quill and Arrow Press The Gilded Fete Royal Buffet
Everything Else
canoo juxtaposition The Herb Garden The Chubby Cupcake Annie Koelle
**We're not joking about helping us spread the word. We've got stacks of postcards ready to share. Please email jen@indiecraftparade.com if you'd like some to put out at your work, school, local coffee shop or anywhere else.
The Makers Summit
Craft NewsRegistration for The Makers Summit is now open!
Check out TheMakersSummit.com to purchase tickets, see the schedule , and meet our amazing speakers.
All the details are there, but here's a brief run-down:
What: A one-day conference for the art, craft, and design world.
When & Where: February 2, 2013 in Greenville, SC
Who should attend: Any creative individual who wants to start or grow their businesses.
What is the cost: Conference tickets are $100 and include breakfast and lunch. Our evening event, The Best Craft Party Ever, will feature an amazing supper followed by a time of crafting, and is $50 to attend.
DIY Chalkboard Lettering with Emily Jeffords
Artist Showcase, ProjectsWe've said this before, but one of the best things about Indie Craft Parade is getting to know the awesome people in the maker community. These connections can provide new friendships, networking connections, business opportunities, and they always supply creative inspiration. For this guest post, we called in one of the amazing connections we've made---the ever lovely Emily Jeffords.
We asked Emily to supply a project for us...and she did something awesome: DIY CHALKBOARD LETTERING. This is an amazing idea. Who doesn't love beautifully hand lettered designs? And now you can do it yourself!
So without further ado, take it away, Emily!
** ** ** ** ** ** ** ** ** ** ** ** ** ** ** ** ** ** ** ** ** ** ** ** ** ** ** ** ** ** ** ** ** ** ** ** ** ** **
Hello! I’m so happy to be guest blogging for one of my favorite groups, Indie Craft Parade! I’m sure you have noticed the growing chalkboard lettering craze sweeping America and Europe right now. It’s pretty awesome. Well, it’s awesome if you have freakishly amazing handwriting (which I don’t!) I can barely write an address on an envelope with grace. Sadly, I’m going to have to leave the hand-lettering to the likes of Dana Tanamachi and Molly Jaques.
The good news: those of us who aren’t Dana Tanamachi can still have amazing chalkboards with freakishly amazing typography and precision (we just need a teensy bit of help from the computer…. Shhh.)
Oh, and lefties, you’re in luck. Because you don’t have to do one bit of writing, you can work from right to left! You should have seen me working on this baby upside down, sideways, and backwards!
This chalkboard DIY is so stylish, so trendy, and so, so easy.
Things I leaned during this DIY:
1. Chalkboard spray paint is a total joke. Just use flat black paint and mix in a tiny bit of clear gesso or unsanded tile grout. I didn’t try the paint can variety. Maybe it’s amazing? 2. Really, really, really cover the paper with chalk. It will save you so much time in the long run. 3. You might want to do a few words with larger text… not going to lie, this took quite a while because my text was so small (and I’m a bit of a perfectionist.) 4. A small paintbrush + water is like a magic eraser.
I hope this inspires you to have fun creating something amazing and original.
Greenville Open Studios 2012 this weekend
Craft News, FestivalsMany of you probably work or live right around the corner from a Greenville artist, and you don’t even know it. Local artists don’t always work out of galleries or official studios, which is why you should take advantage of Greenville’s annual Open Studios. This event not only gives the community a chance to meet more of Greenville’s artists but also to tour their work spaces, to get to know their processes, and to connect on a more personal level. Open Studios is THIS WEEKEND! Saturday, November 3, 10am – 6pm & Sunday, November 4, Noon – 6pm. A few artists are even open on Friday evening.
About Greenville Open Studios from the Metropolitan Arts Council: Now in its eleventh year, Greenville Open Studios began as an idea cast about during a casual conversation between a small group of artists several years ago; they discussed doing something to raise awareness in the greater community of the tremendous creative energy in the area. The idea has evolved into a full-fledged annual event.
The 2012 self-guided tour will feature 140 artists and their studios this year. Studio locations vary throughout a 15-mile radius of downtown Greenville with Easley, Greer, Travelers Rest and Dacusville included. Catalogues are available at MAC as well as at each artist’s studio.
Open Studios even has a smart phone app that you can use to guide you to the artists and tell you about their work. Check it out at greenvilleopenstudios.com.
Indie Craft Parade Holiday Fair
Craft News, FestivalsIt's time to announce yet another fun project we've had up our sleeve. This December, we'll be hosting the very first Indie Craft Parade Holiday Fair! This will be a much smaller scale version of our main event, featuring 25 previous Indie Craft Parade participants.
The Fair will be held at Artisan Traders in Greenville's art district (see map below) and will be open from 10am - 5pm Saturday, December 1. Come support local artists and give one-of-a-kind gifts this year.
Admission is free, so mark your calendars and plan to bring your friends and family! More details will be coming soon.
What: Indie Craft Parade Holiday Fair When: Saturday December 1, 10 am – 5 pm Where: A smaller, more intimate venue in the Pendleton Street Arts District Artisan Traders, 1274 Pendleton Street, Greenville, SC 29611
The Lamp Post Guild on Kickstarter
Artist Showcase, Craft NewsWe love sharing with our community the newest resources and trends in the world of making, which is why I nearly flipped when I saw this new Kickstarter project called The Lamp Post Guild. Three professional illustrators from Greenville (2 of which have been Indie Craft Parade vendors) have created an online course to teach people how to turn their passion of art/illustration into a career.
Statement of purpose from The Lamp Post Guild:
Every kid drew pictures until someone told them they couldn’t.Millions of people wanted to become artists when they grew up,but they were told that being an artist is not a "real job."Only a few of them will actually make it as professional artists.It doesn't have to end this way.
We want to make this story end differently for these aspiring illustrators and artists by teaching online courses that will help them improve their craft and earn a living doing what they love.
This presentation is done beautifully, and if you have people in your life who would benefit from taking these classes, you should seriously consider supporting!


